What do “Moscow country nights” taste like? This cake is the answer! (RECIPE)

This is a rare multi-layered homemade cake named after a famous Soviet song.
Victoria DreyMany people who lived during Soviet times remember the once popular “Moscow country cake” – one of the many GOST-cakes created by Soviet confectionaries (i.e. produced in accordance with the state quality standards). Four shortcrust pastry layers, nuts, thick fruity jam as a filling and chocolate glaze – the cake was quite simple as far as ingredients and the cooking process, which made it easy to produce and sell all over the huge country.
Most likely, this cake became the inspiration for another cake, “Moscow country nights”, which is a similar homemade dessert but more delicious and interesting as far as the recipe. By the way, the cake was named after the eponymous famous post-war song, “Podmoskovnye Vechera” (literally “Moscow country nights”), that was released in the 1950s and which remains one of the most popular Russian folk songs from the second half of the 20th century.
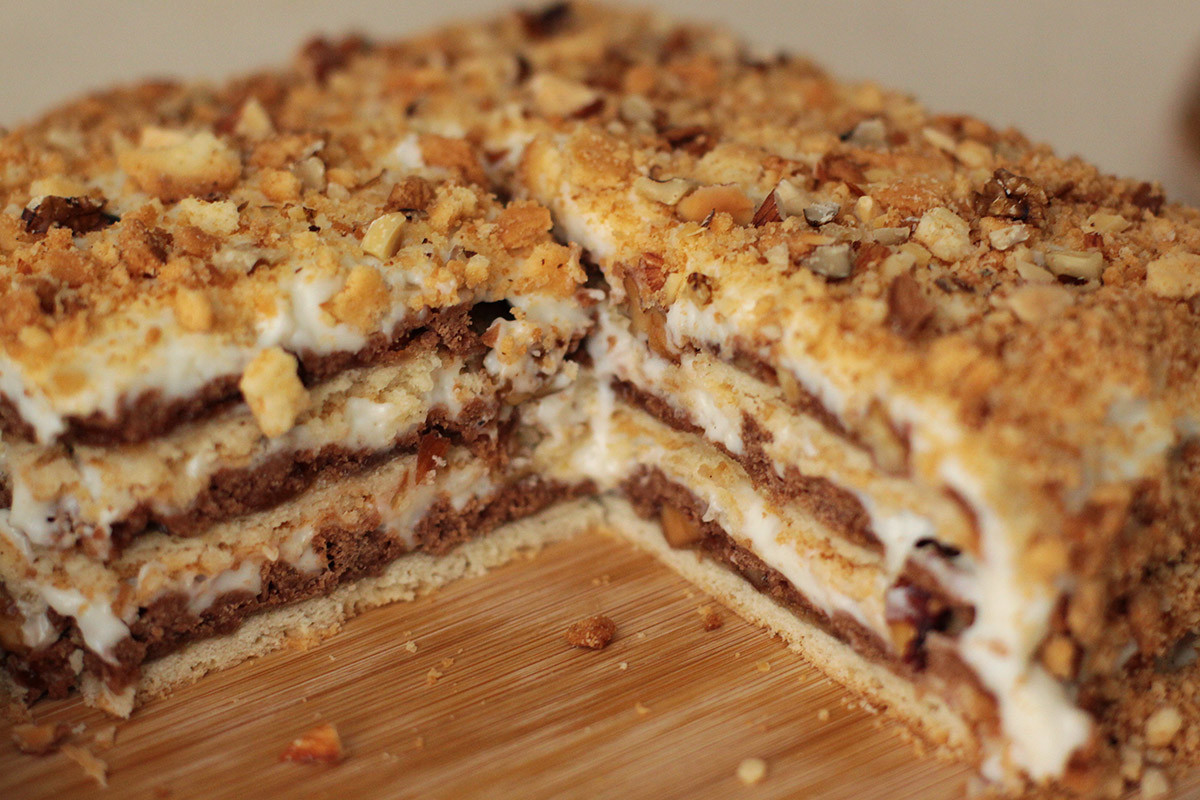
The difference between “Moscow country nights'' and its elder sibling cake is the filling: instead of smearing shortcrust layers only with jam as in the GOST version, there are also layers of rich cream based on sweet condensed milk that makes the cake so scrumptious. The pastry is also not the same: in “Moscow country nights” there are two types of shortcrust, vanilla and cocoa, instead of the basic one. Truly, this is not the quickest and easiest cake to make – but sandwiching all these shortcrust layers, custard, nuts and jam results in one of the most show-stopping homemade cakes ever.
Ingredients:
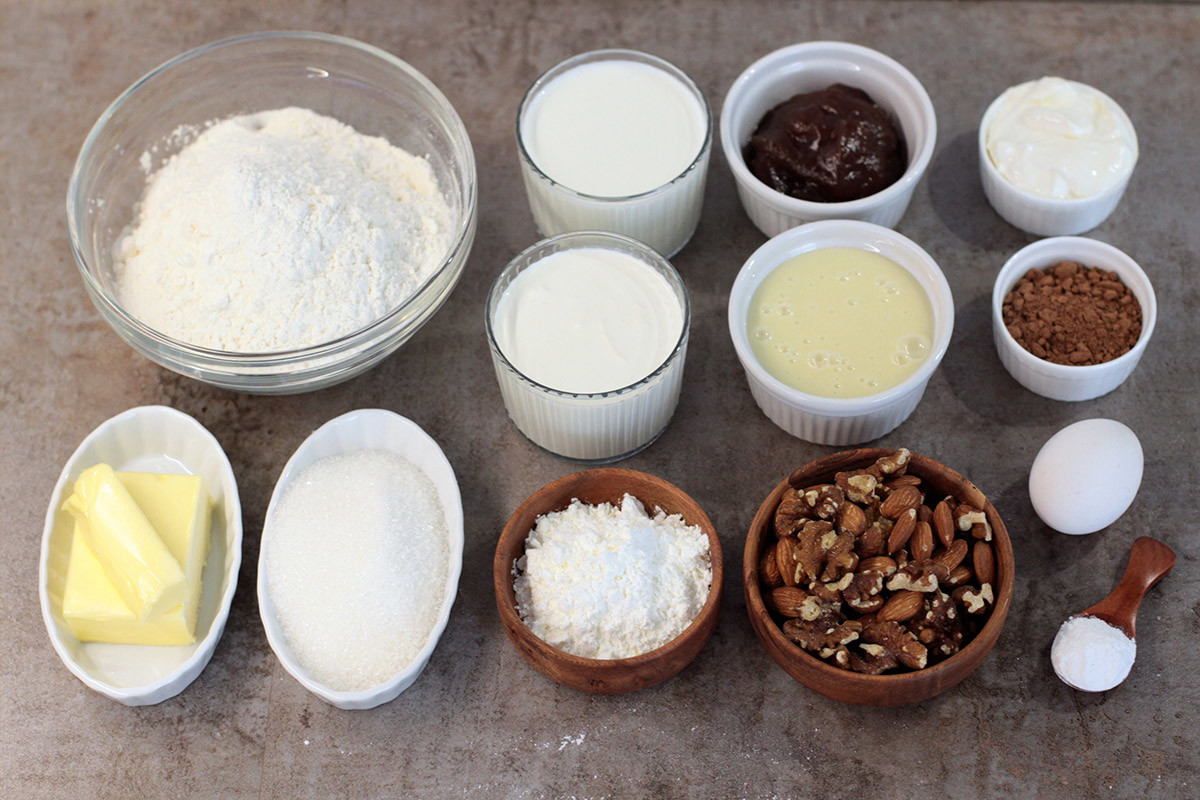
For the pastry:
- 300-350 g flour
- 100 g sugar
- 140 g butter
- 70 g sour cream
- 15 g cocoa powder
- 1 egg
- 1 tsp vanilla sugar / extract
- 1 tsp baking powder
- a pinch of salt
For the layering:
- 100 g nuts + 20 g for decoration
- 150 g thick fruit / berry jam
For the cream:
- 300 ml milk
- 140 g sweet condensed milk
- 140 ml heavy cream (33%-37% fat)
- 30 g cornstarch
- 1 tsp vanilla sugar / extract
- a pinch of salt
Preparation:
1. In a large bowl whip softened butter for a couple minutes until it becomes pale and airy – use your hand or a stand mixer. Add sugar, vanilla extract or sugar and whip for another 5 minutes.
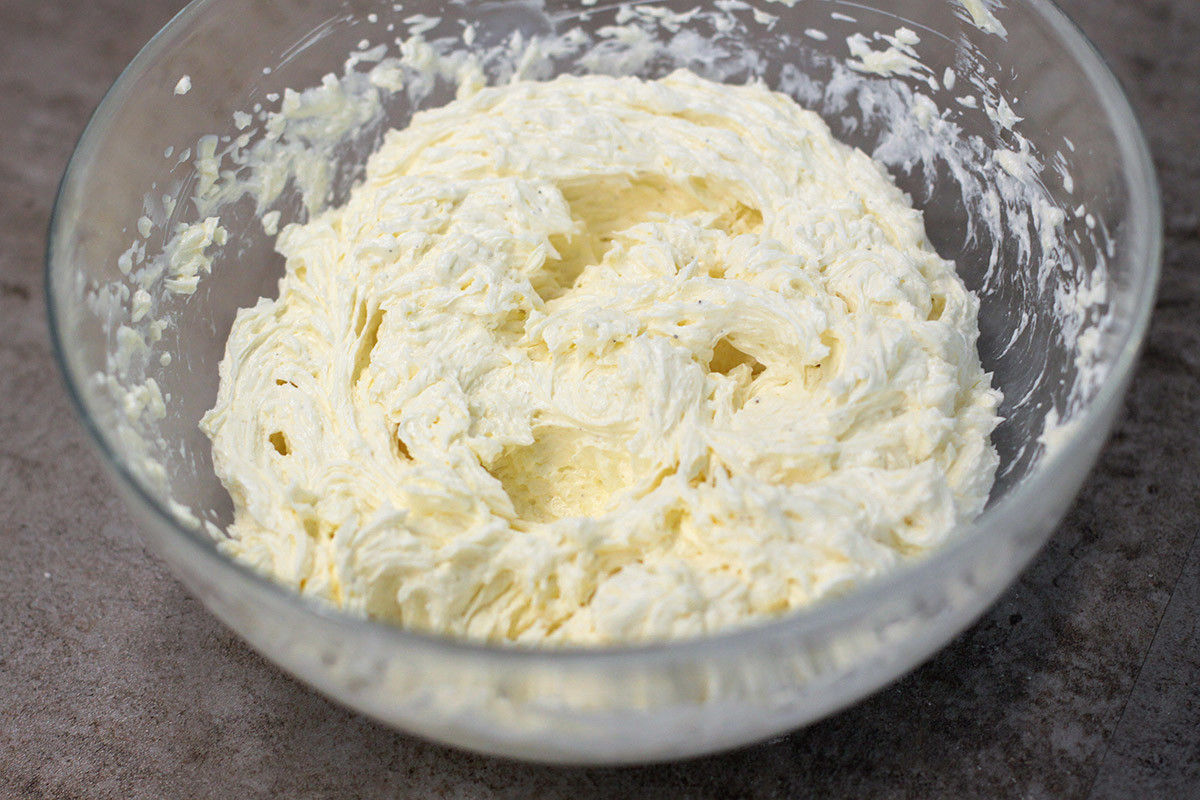
2. Add one egg, sour cream, salt and mix until smooth. Next comes the sifted flour mixed with baking powder – add it gradually, by 3-4 tablespoons at a time, and continue kneading.
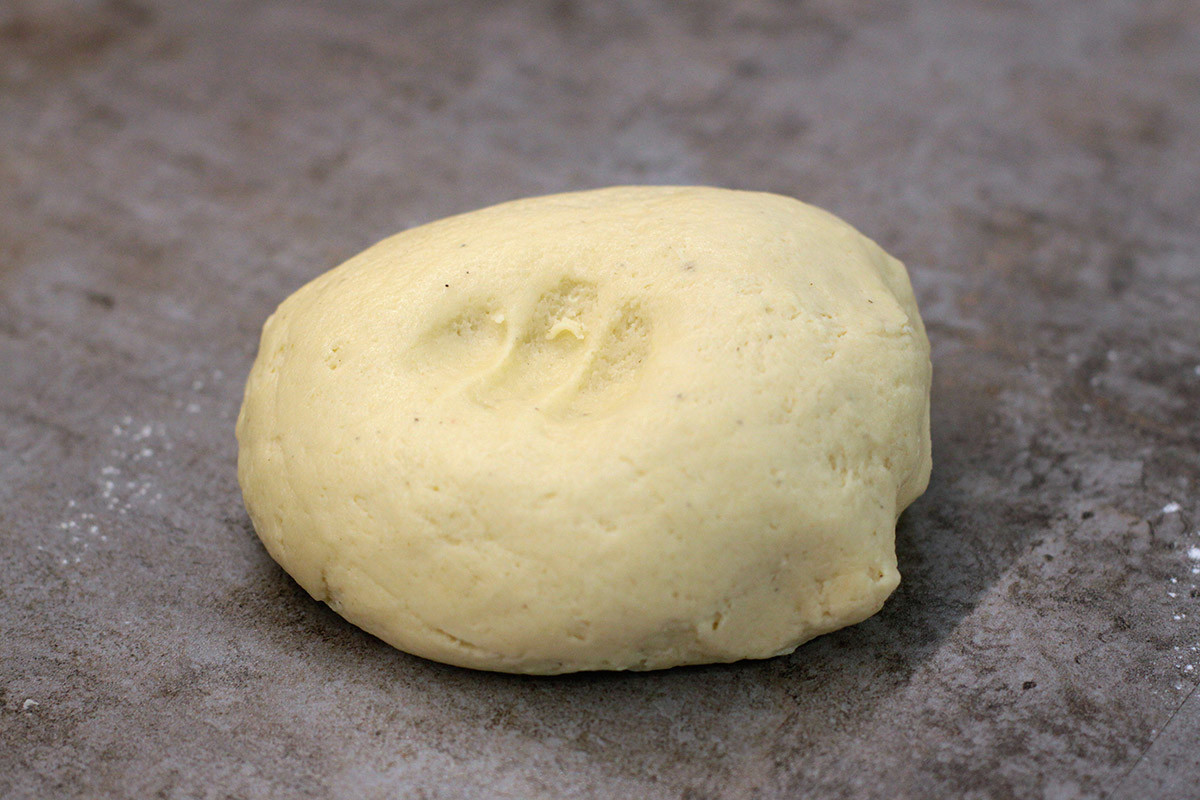
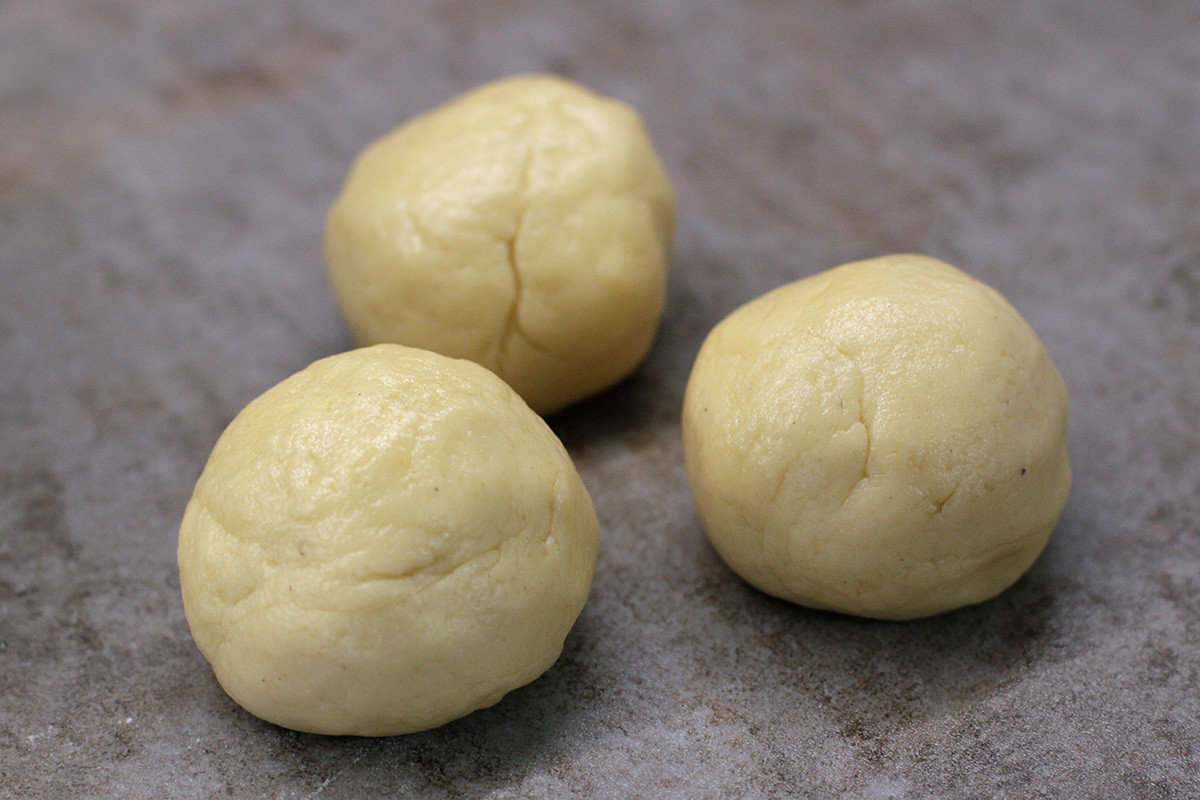
3. You should get a quite soft and non-sticky shortcrust pastry. Separate 2/3 of it, divide into 3 equal portions, round each into a ball, wrap in cling film and set aside in the fridge for 1 hour.
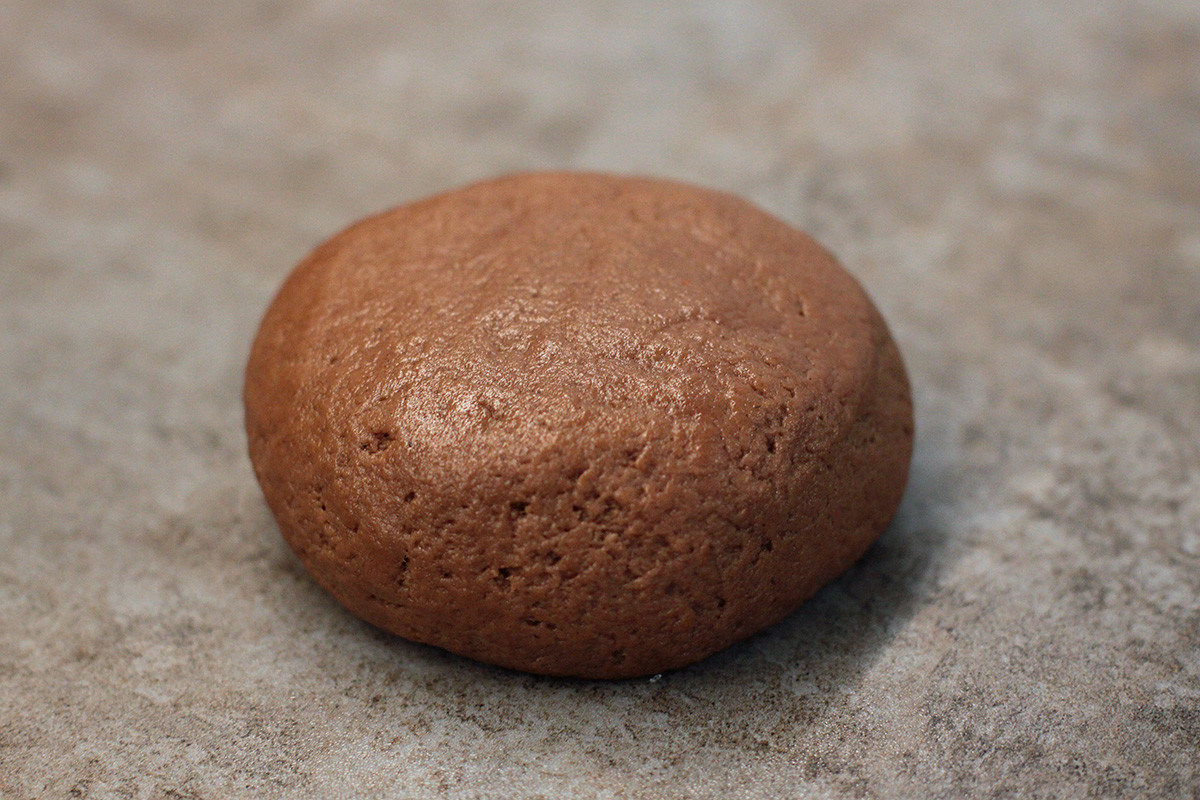
4. Add cocoa powder to the remaining 1/3 of the dough and knead until you get a smooth brown color. Again, round into a ball, wrap in cling film and put in the refrigerator for 40-60 minutes to set.
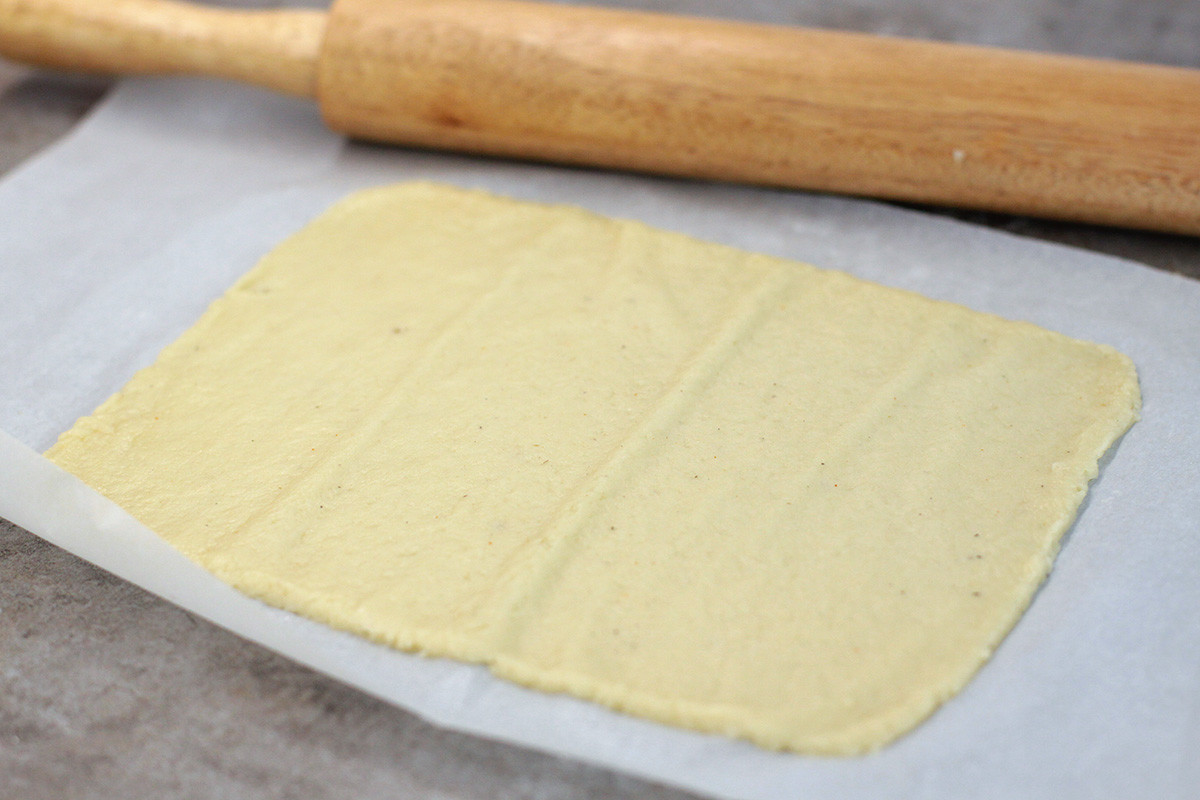
5. Back to the chilled vanilla dough – working with one at a time, roll a cold piece into a 2 mm thick layer right onto a sheet of baking parchment. Cut off uneven edges to get a square or rectangle shape. Do not throw away the edges – we will use them later.
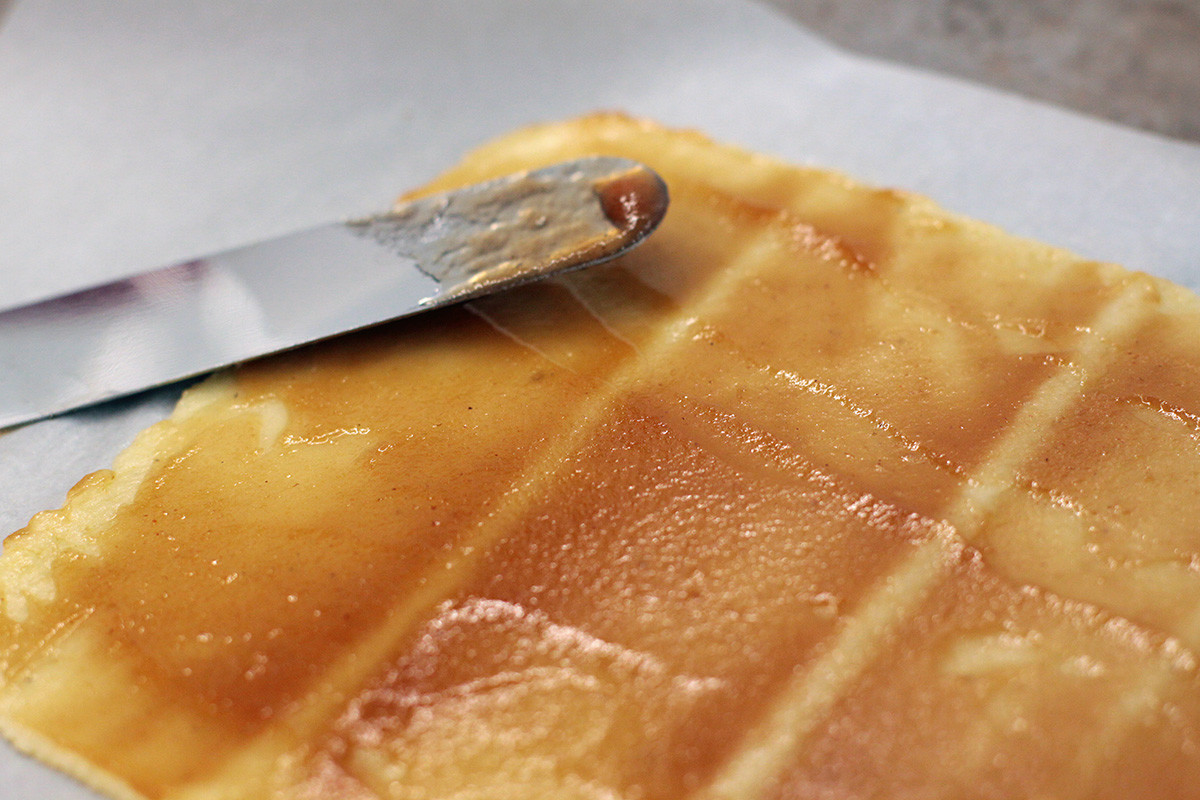
6. Now take 1/3 of fruit or berry jam and spread it over the pastry layer evenly. Feel free to use any jam you like – I use sourish apple jam as the cream, and the pastry in this recipe is already quite sweet. The only claim – your jam should be thick so that it does not leak while baking.
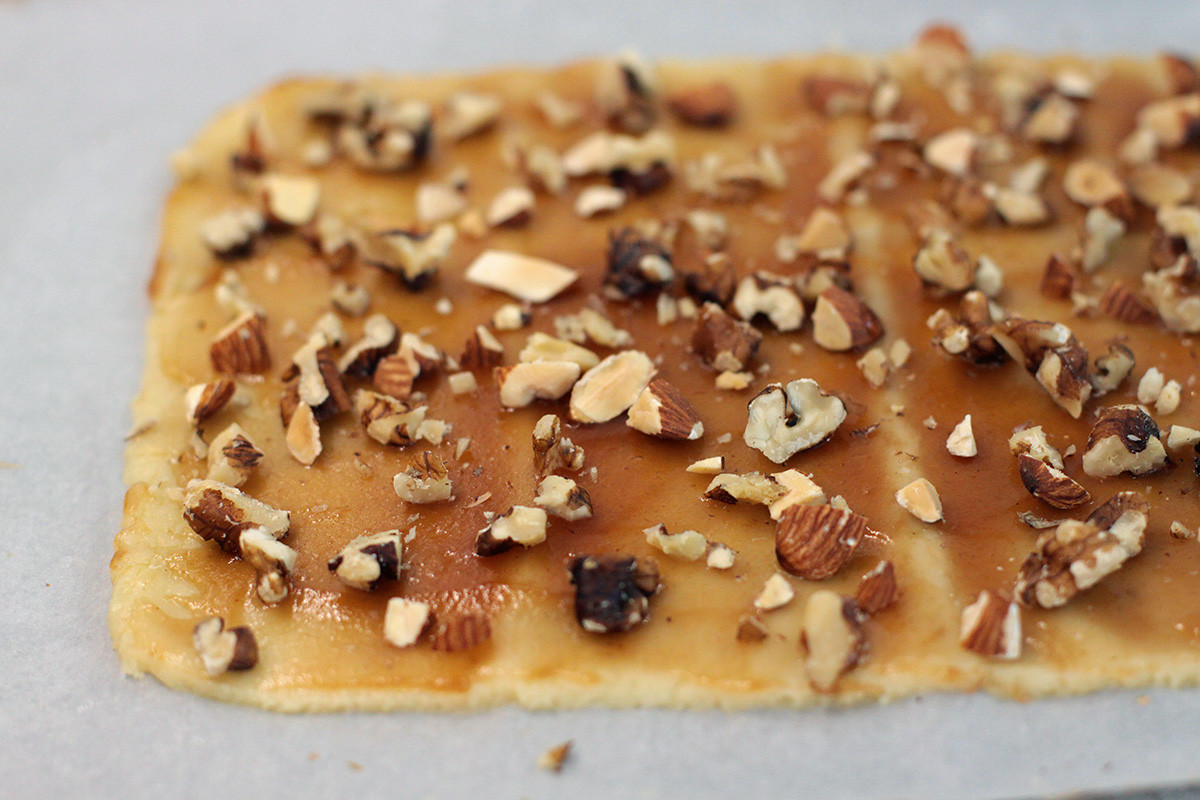
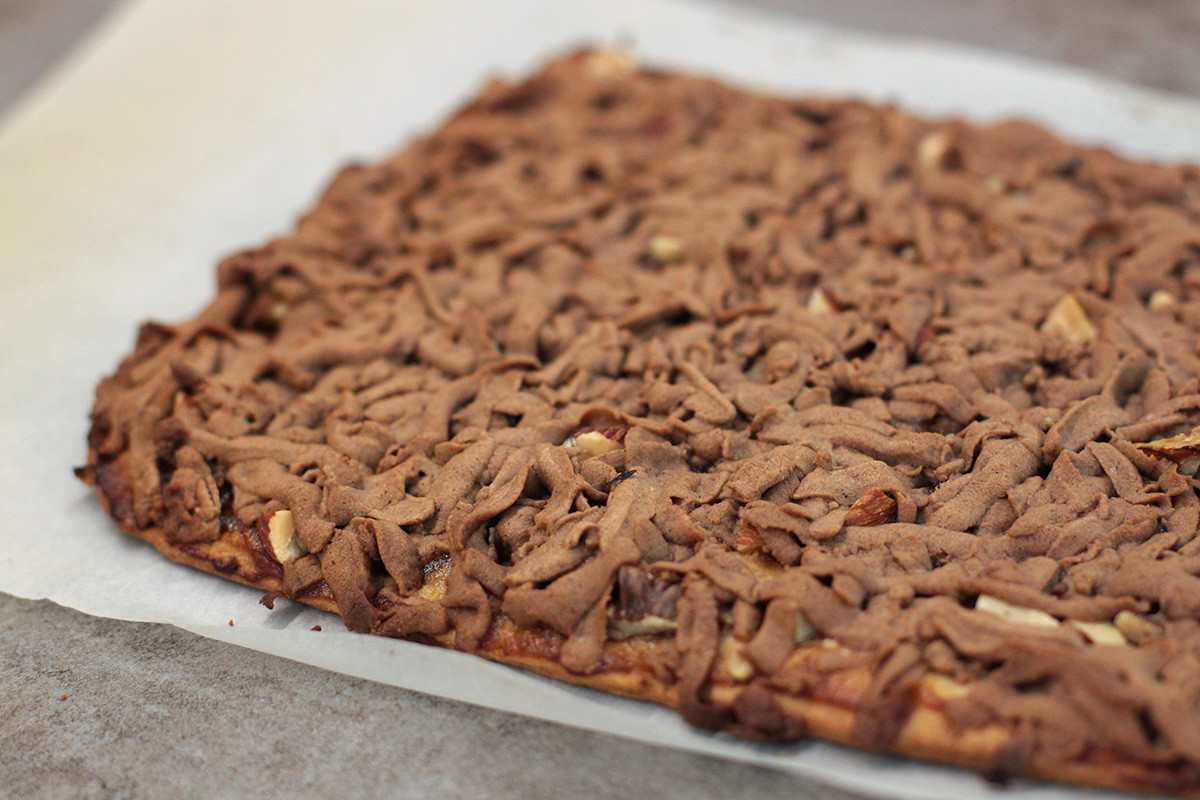
7. Next, sprinkle 1/3 of the nuts (50/50 walnuts and almonds in my case) on top of the layer – chop them slightly before adding.
8. Finally, take your frozen cocoa pastry piece and grate 1/3 onto a layer using a basic cheese grater. The first layer is ready – now place it on a baking tray and put in the oven at 200°C for 15 minutes.
9. Repeat the whole process with another 2 layers: sandwich and bake the same way. Set them aside to cool completely.
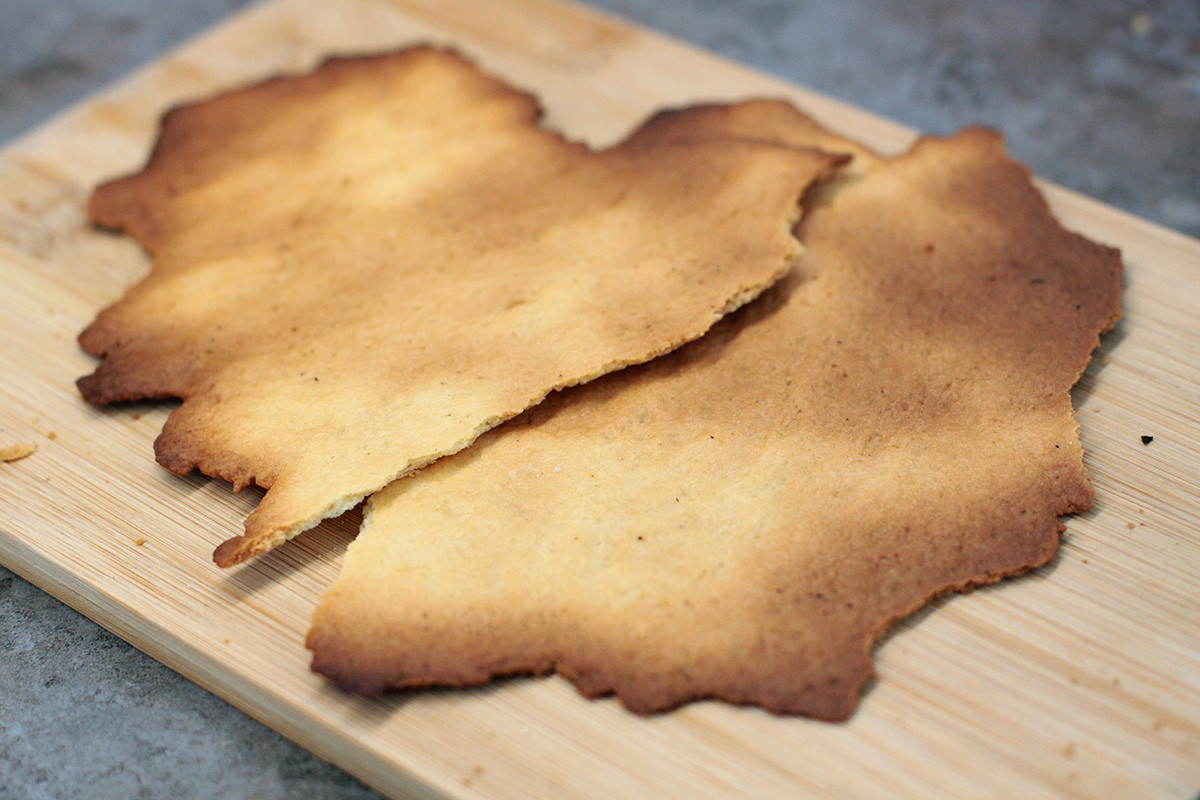
10. As for the remaining pastry edges, piece them together, roll out and bake as well for 7-10 minutes until you get a golden-brown surface. Wait until the layer is cooled and crumple it finely to use for cake’s decoration later on.
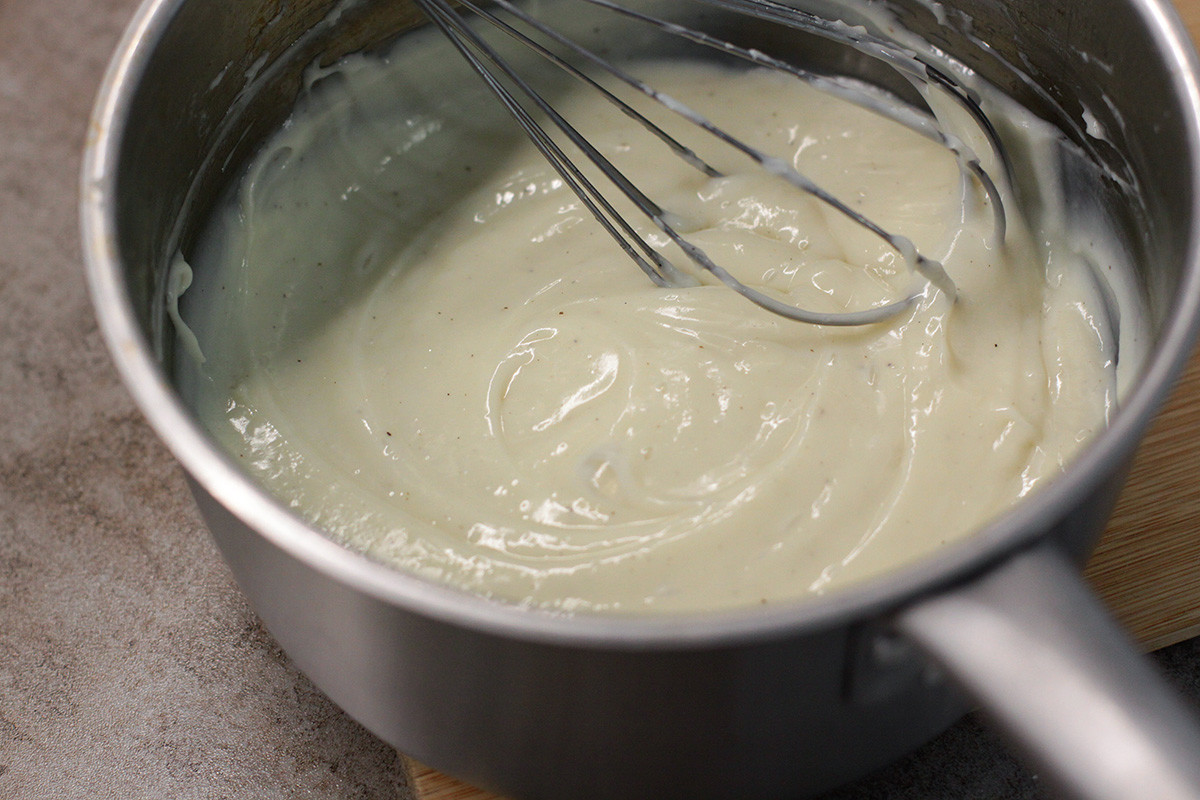
11. Now, moving to the cream: in a saucepan mix cornstarch with half of the milk until even free of clumps – the higher fat content milk you use, the richer the taste of the cream. Add sweet condensed milk, the remaining milk and a good pinch of salt – mix again and put on medium heat.
12. Constantly stirring the mixture, cook until it thickens like your basic custard – cover with cling film and set aside to cool completely.
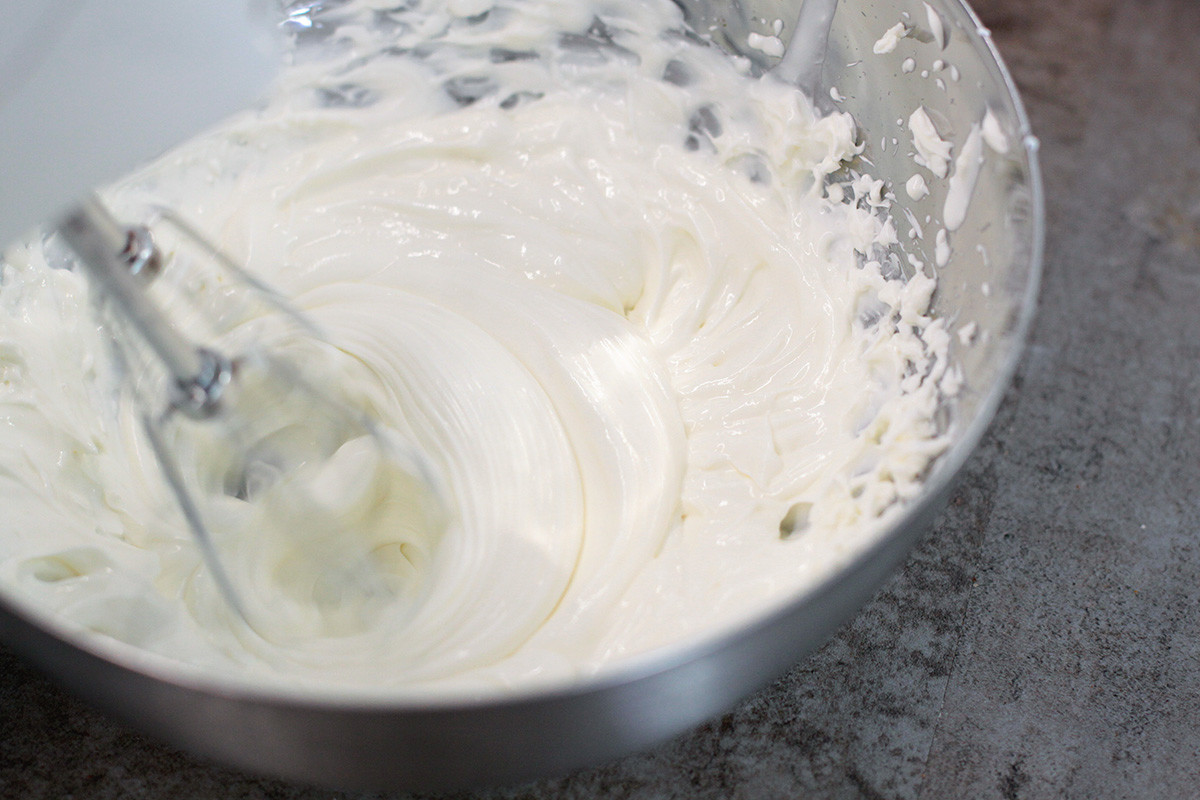
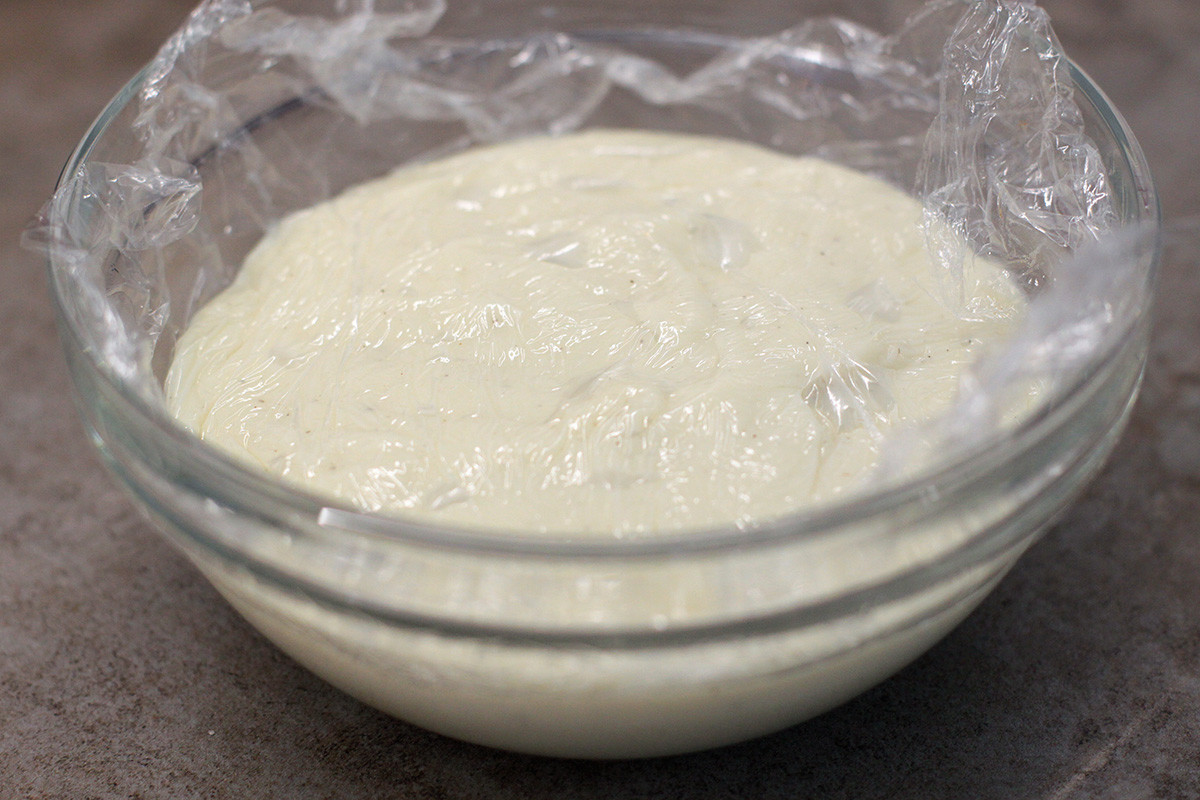
13. Meanwhile, whip heavy cream until you get soft peaks – the traditional recipe calls for using butter at this point, but I’m not the biggest fan of a buttercream base, so usually replace it with whipped heavy cream or mascarpone.
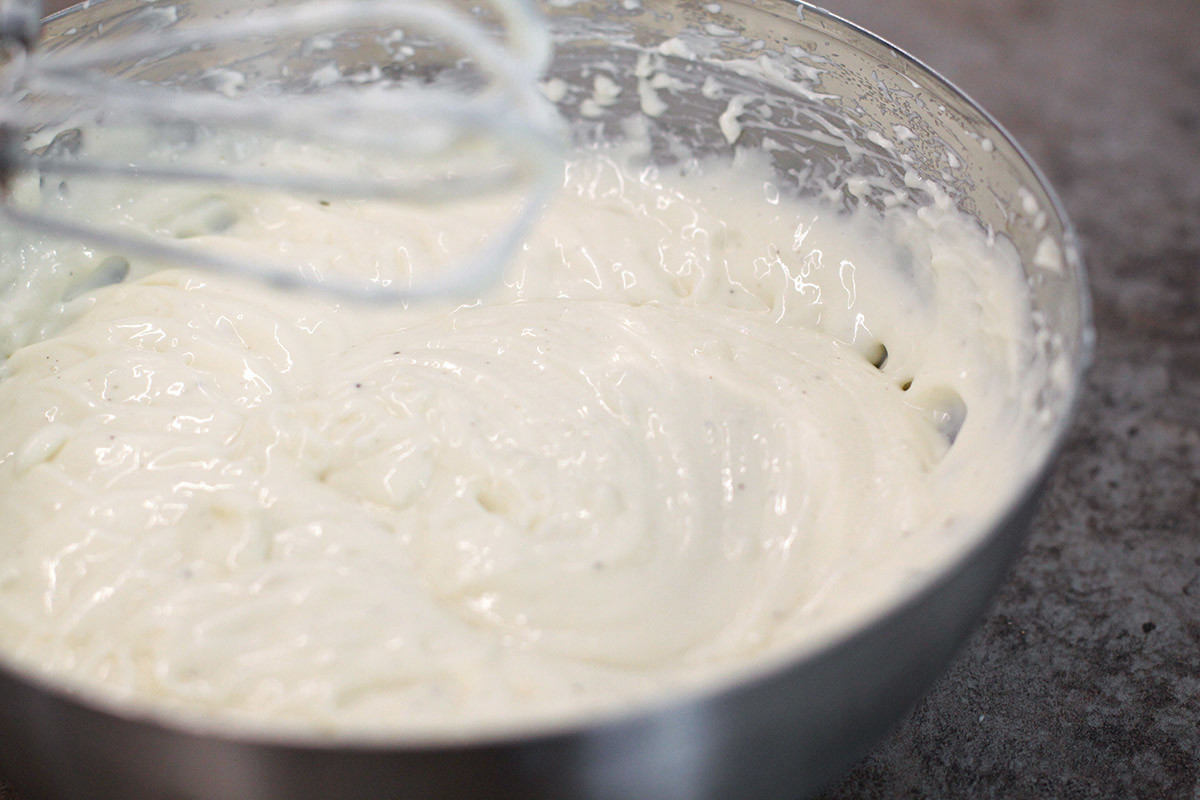
14. Combine the whipped cream with cooled custard – the cream is ready!
15. All you have to do next is to assemble the cake: generously cover the first layer with the cream, put the second layer on top and repeat with the rest.
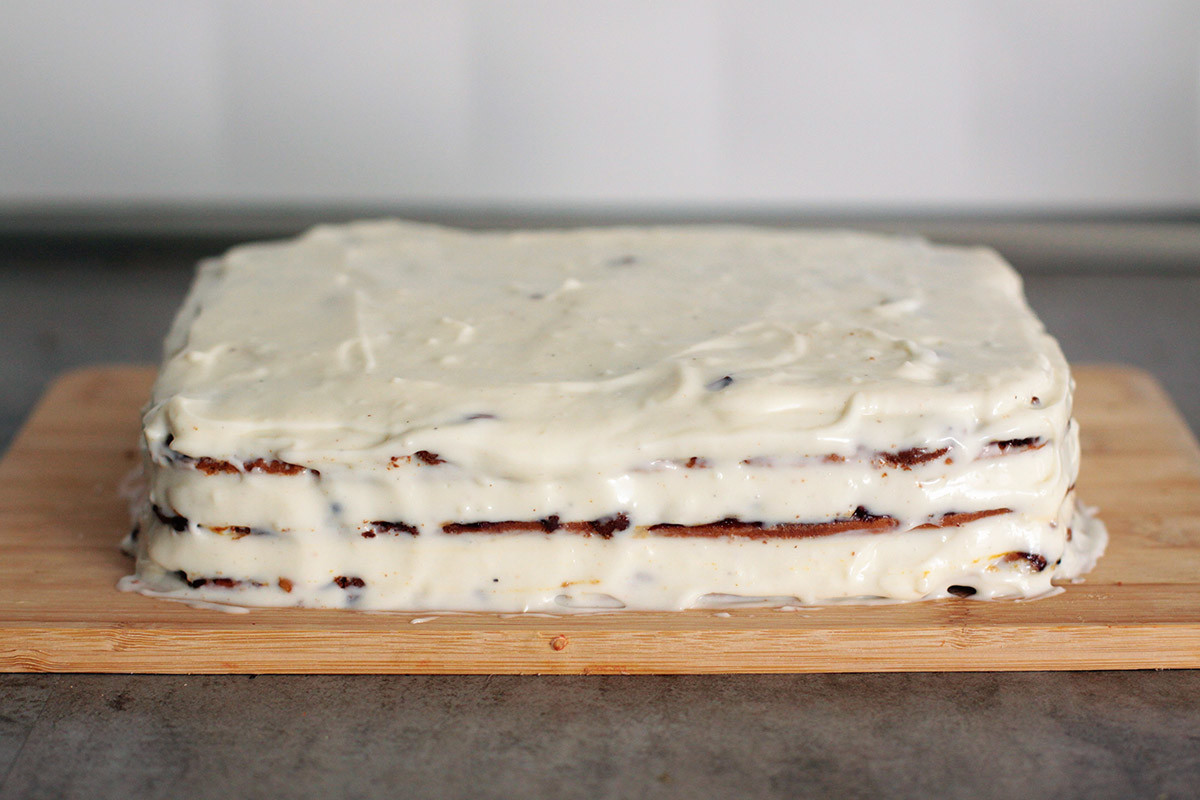
16. Finally, spread the remaining cream over the cake’s edges and sprinkle it with pastry crumbs and chopped nuts.

17. Here is the last and most difficult step – leave the cake in the fridge for at least 5-7 hours, or better, overnight to set and saturate. Then, cut in nice pieces and enjoy “Moscow country nights” with a cup of black coffee – priyatnogo appetita!
READ MORE: Tsvetaeva strawberry pie: A summer twist on a Russian poet’s favorite dessert (RECIPE)
If using any of Russia Beyond's content, partly or in full, always provide an active hyperlink to the original material.
Subscribe
to our newsletter!
Get the week's best stories straight to your inbox