Aurora Photo Hunt: Make the most of your Polar Circle photo opportunities
Here are some historical aspects: Salekhard arose at the confluence of two rivers – Polui and Ob somewhere between the 16-17th centuries. The Obdorsk castle-fort was built by the Russian Cossacks and became the northern outpost of the Russian state. In 1635 the prison was renamed and became an outpost, and then the outpost was transferred into the Obdorsk settlement. The locals mainly engaged in fishing, hunting and trade, not counting the inhabitants of the tundra, who still make a living off reindeer breeding. In 1933 Obdorsk was renamed and became Salekhard, which in the Nenets language means "the settlement on the cape", and became the capital of the Yamal-Nenets Autonomous District and in 1938 became a city.
Where to look for the arctic lights
We can see the northern lights near the Arctic Circle and within the Arctic Circle, the farther north we go – the more chances we have to see it. But the northern lights are not constant and can take up large areas beyond the Arctic Circle – it depends on the formation and the power of the solar flares. Now it is much easier to predict when exactly the northern lights will appear, there are several websites that publish more or less accurate information regarding solar activity. In Salekhard there is a rule: when night falls, if there are no clouds in the sky, you have to be especially careful, because the northern lights can start shining any minute.
Besides Salekhard, the most frequent auroras occur near the Kola Peninsula (in Murmansk, Kirovsk and Hibiny). In addition, they are also common for Arkhangelsk, Yakutia and Taimyr. In Russia, the Northern Lights can be seen even in the more southern areas – in, for example, Karelia, Valdai, Saint Petersburg and Yekaterinburg.
Even at high solar activity, you won’t be able to see the sky in color for the whole night. The Northern lights may appear for 5 minutes, or 10 minutes, or even for a half an hour – you never know!
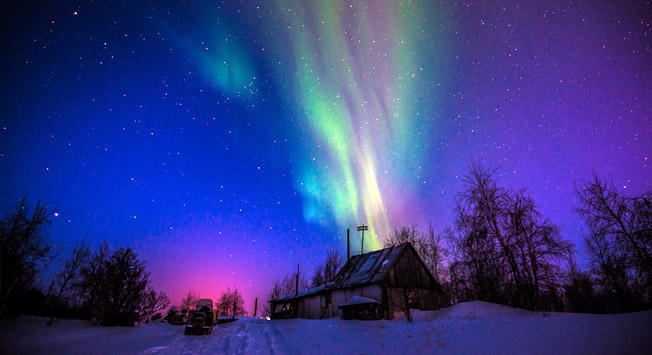
The most common colors for the aurora are: pale green (when oxygen atoms collide with electrons) and purple (when nitrogen molecules are in the upper layers of the ionosphere), but sometimes there is even a red glow (when there is nitrogen in the lower layers).
How to take pictures
In order to take pictures of the aurora, you must have a camera that can shoot at long exposures and that has an automatic shutter release function with the ability to set the time of the self-timer. The camera must be kept in a heat-insulated camera bag or under clothing. You will also need a tripod – it will be difficult to achieve the desired result without it, because the movement of the camera during shooting will cause the photographs to be blurred.
Finally, be sure to take the following with you: a thermos, boots and a great desire, because not everyone will agree to freeze in the cold night, and the night sky and frost do not care that you came to see a true masterpiece.
When you arrive at the photo shooting location, look around, adjust the tripod, and try to set the optical exposure in advance, especially if, by chance, the city lights are going to get in the way. The shutter should be rather long, because the Northern lights are not very bright, but do not forget that the night-time should be seen in the photo. If possible, increase the sensitivity, but be careful – you don’t want the noises to mess up your efforts. Do not forget to set the time of the shutter button, for example, every 2 seconds.
As soon as you notice the flaming aurora, take your camera out, set it on a tripod, point it at infinite distance, remove the lens cap (if any), then direct it towards the aurora and shoot with the adjusted settings. By the way, you should change the latter during shooting, because the aurora will probably make you adjust the exposure setting (close the aperture by a half or whole level, lower the sensitivity matrix or reduce exposure). Make sure that your hands are nowhere near the object-lens, otherwise they will fog up and the photo session will end because the moisture condensation will freeze immediately and you won’t be able to get rid of it until the object-lenses become room temperature.
When to take pictures
Some people believe that in order to see the aurora borealis, you should pick December, January or February – so to speak, the darkest months. Yes, there are, of course, more chances to see the Northern lights at this time, but only because the nights are longer. You can, nevertheless, have a successful shooting experience in April, when the day is just starting to fade away or, on the contrary, just getting started. You can see the Northern lights even at dawn. And finally, of course, when the polar day comes, starting from the beginning of May, the sky becomes so light that no matter how we try, we will not be able to see the Northern lights.
All rights reserved by Rossiyskaya Gazeta.
Subscribe
to our newsletter!
Get the week's best stories straight to your inbox