How to make the most realistic shortcrust “mushrooms” – a Soviet guide
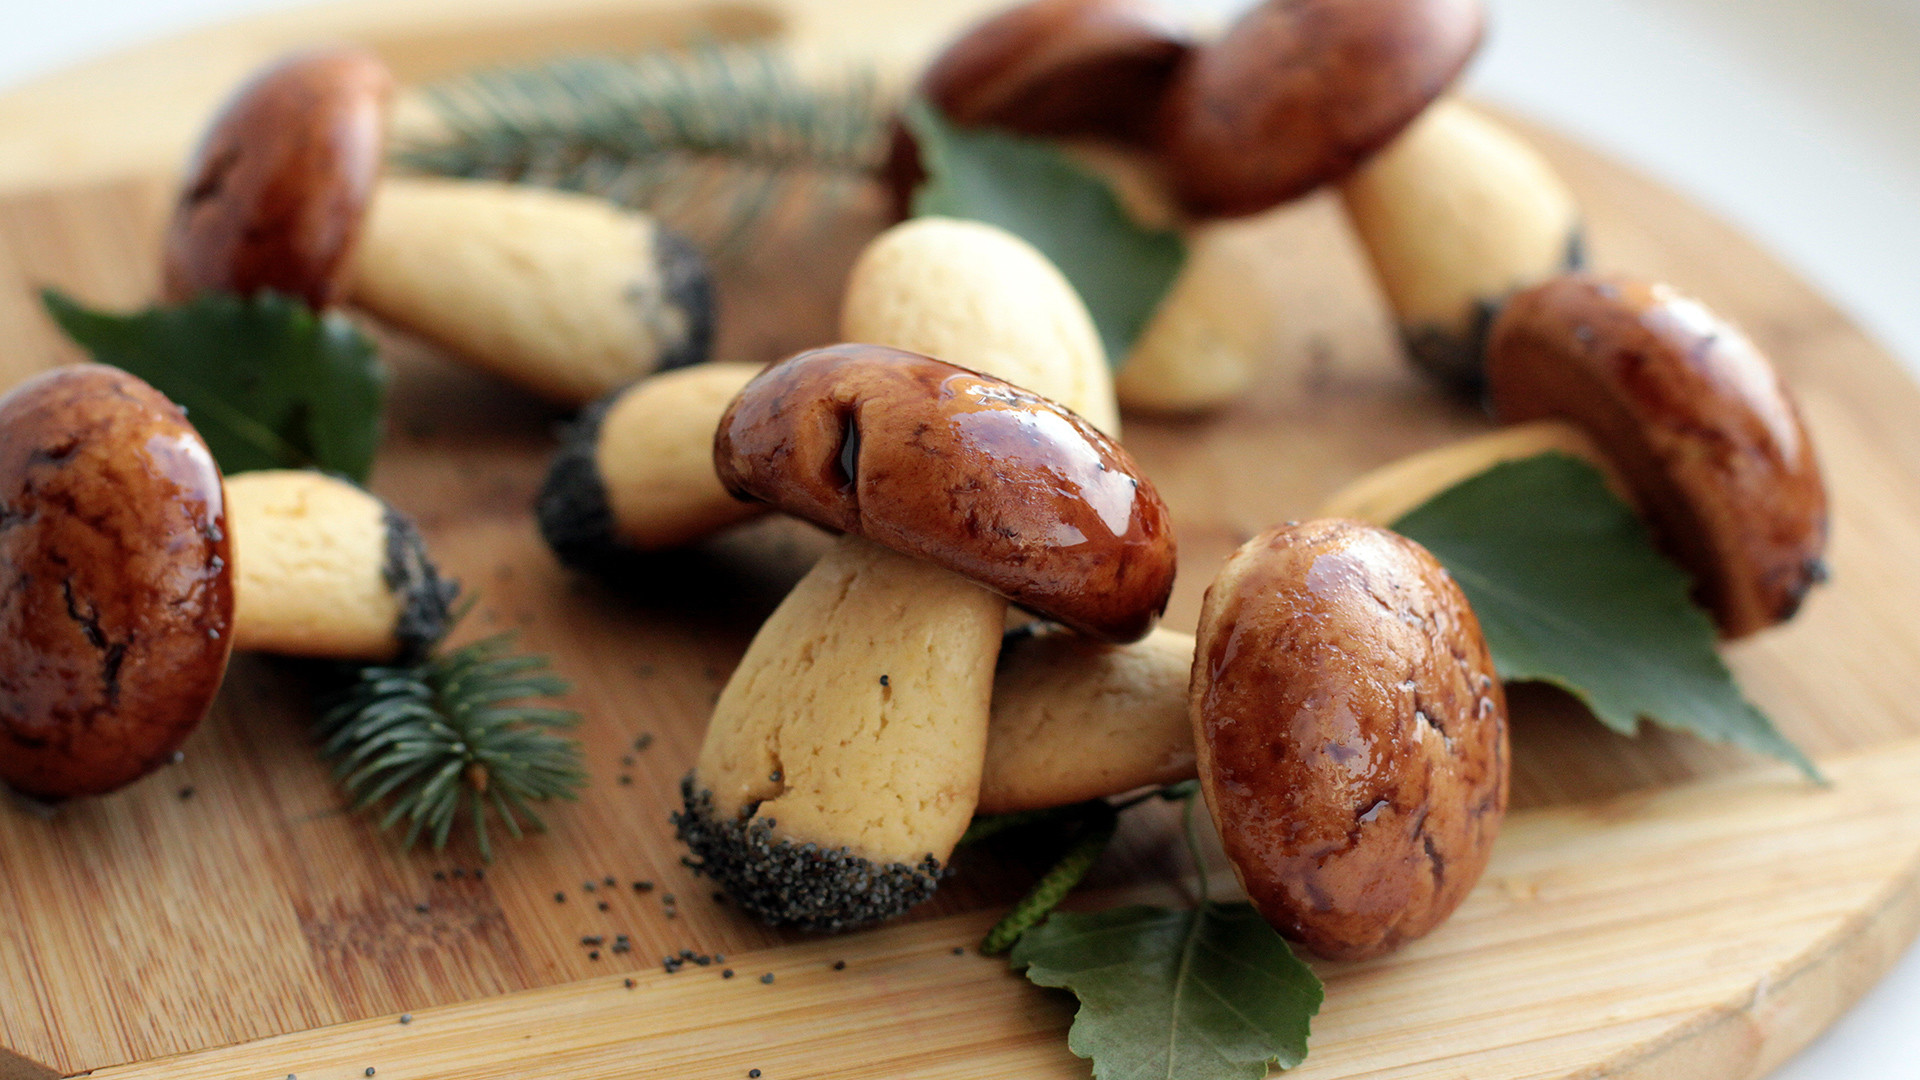
The more I dive into Soviet recipes the more I notice that many iconic dishes from Soviet cuisine originated right in home kitchens, and for the longest time weren’t even sold in stores – “mushroom” cookies are definitely one of this kind. They were called gribochki, which in Russian literally means “small mushrooms”.
My granny said that gribochki were one of my father’s favorite cookies, mostly because of the special baking forms used to cook them. It was a very heavy two-part cast iron mold with the hollows in the shape of mushrooms to bake on a gas stove – quite similar to the “nut” forms that were no less popular. Grandmother remembers that at that time it was very difficult to get your hands on these cookies molds, and all her friends were literally chasing her to have them. Moreover, shortcrust mushrooms were not sold anywhere, so the only way you could try them was to make them at home kitchen.
My mom, however, used to make those cookies without the form – just by putting the pastry into a mushroom shape by using her hands. Today, I also don’t have the mold, but I believe gribochki look even more impressive and realistic than the mold ones. Another point that I love about this particular recipe is the pastry – adding sour cream to your regular shortcrust leaves you with the most tender but still crunchy cookies, so don’t be surprised if you can’t resist the urge to eat all the “mushrooms” as soon as they’ve been baked.
Ingredients for the pastry:
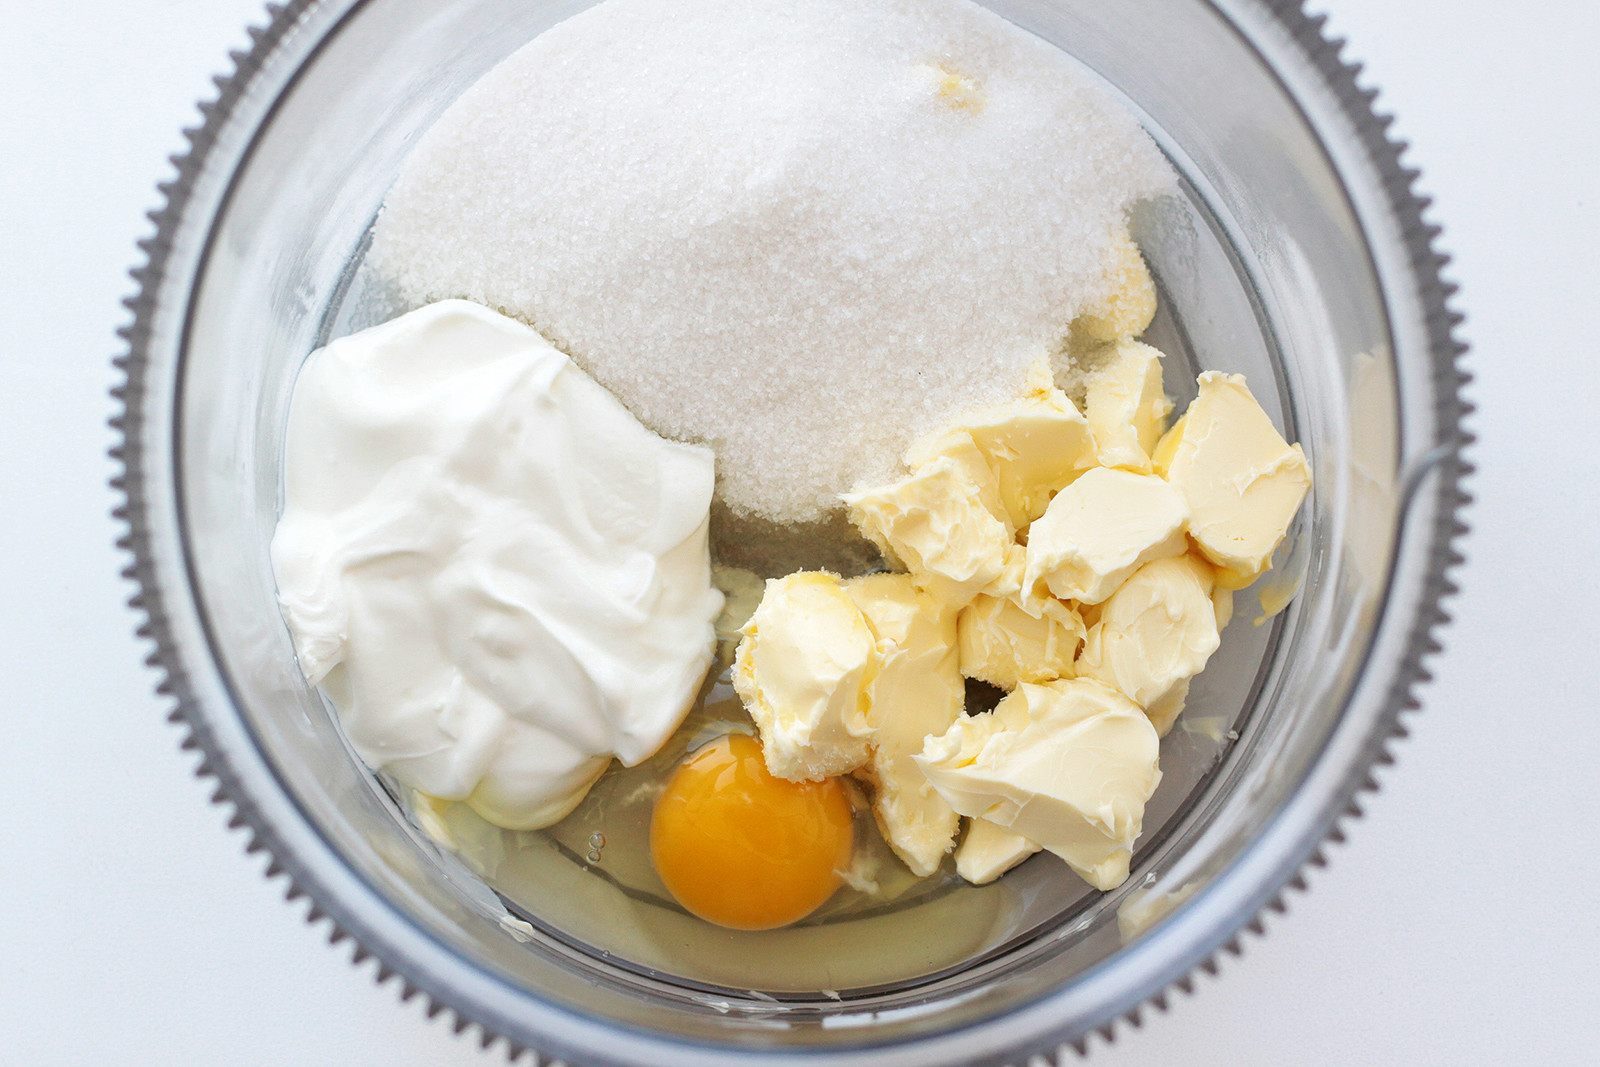
- 200g butter;
- 150g sugar;
- 100g sour cream;
- 400g flour;
- 1 egg;
- 1 tsp. baking powder;
- a pinch of salt.
Ingredients for the syrup:
- 100g sugar;
- 3 tbsps. water;
- 1 tsp. cocoa powder;
- + poppy seeds for decoration.
Cooking:
1. For shortcrust pastry put softened butter, egg, sour cream, sugar and salt in a large bowl – all the ingredients should be room temperature.
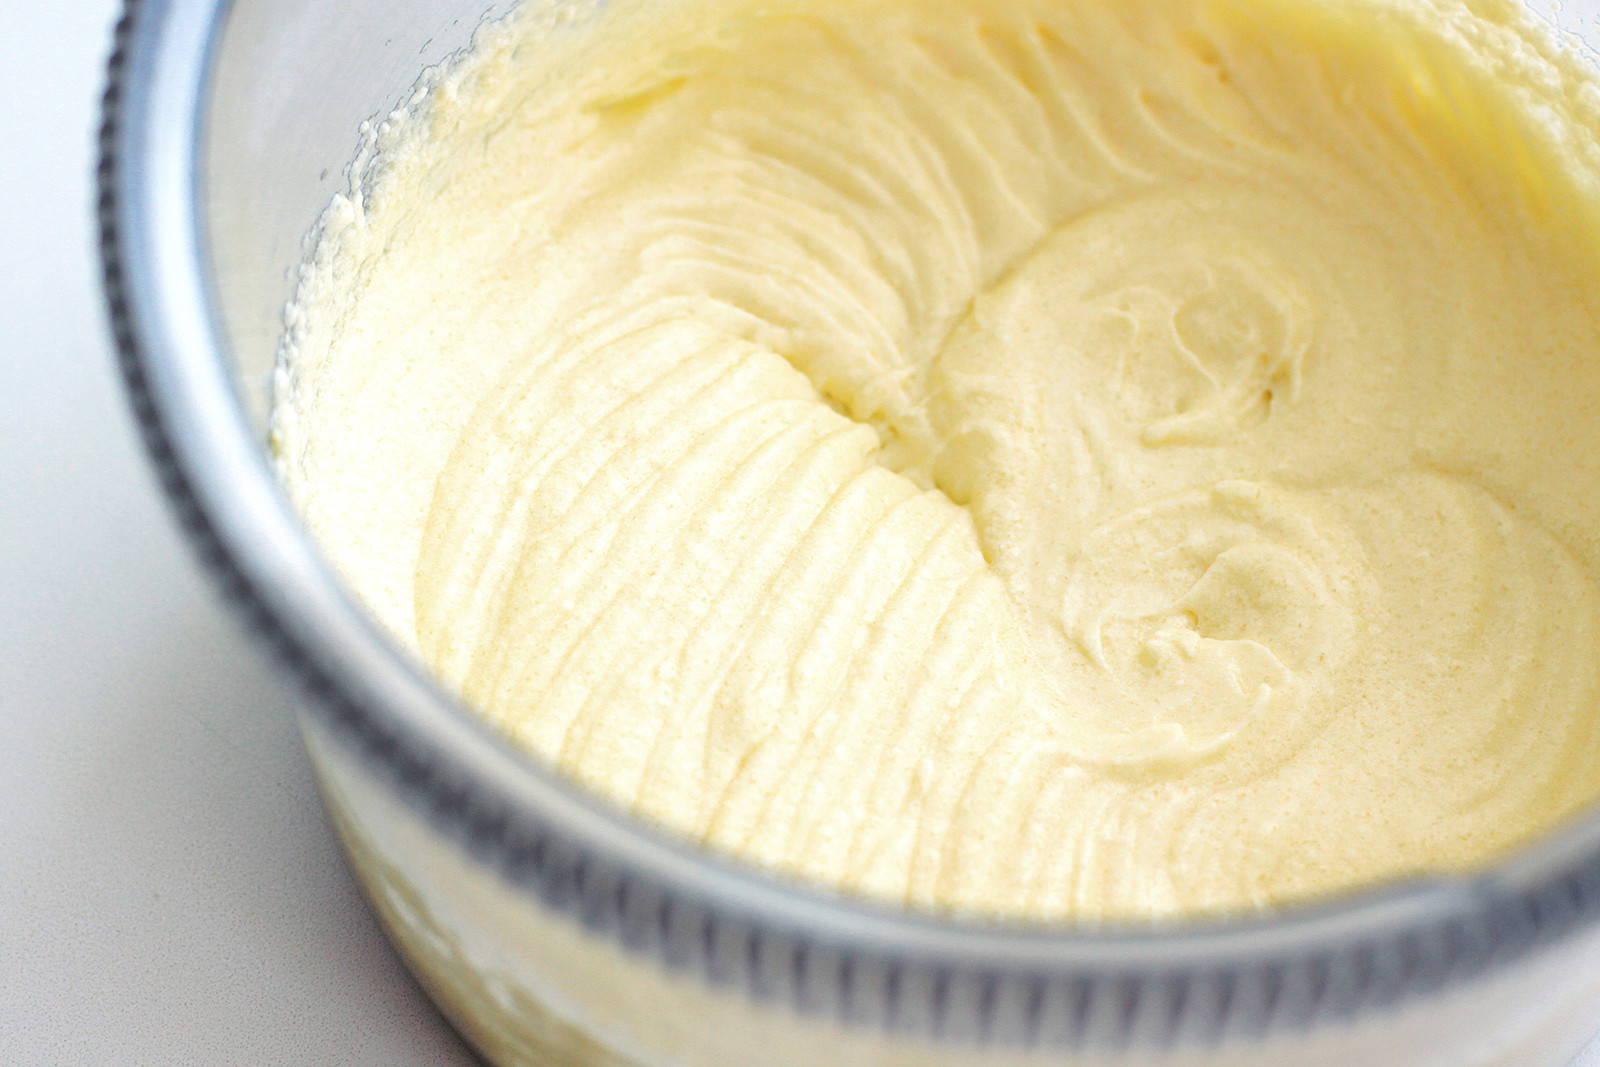
2. Using a mixer whisk for a couple of minutes until you get a smooth consistency. Next, add sifted flour with baking powder – you may need more or less, depending on the flour used, so I recommend adding around 300g at first, and then the remaining flour, if needed.
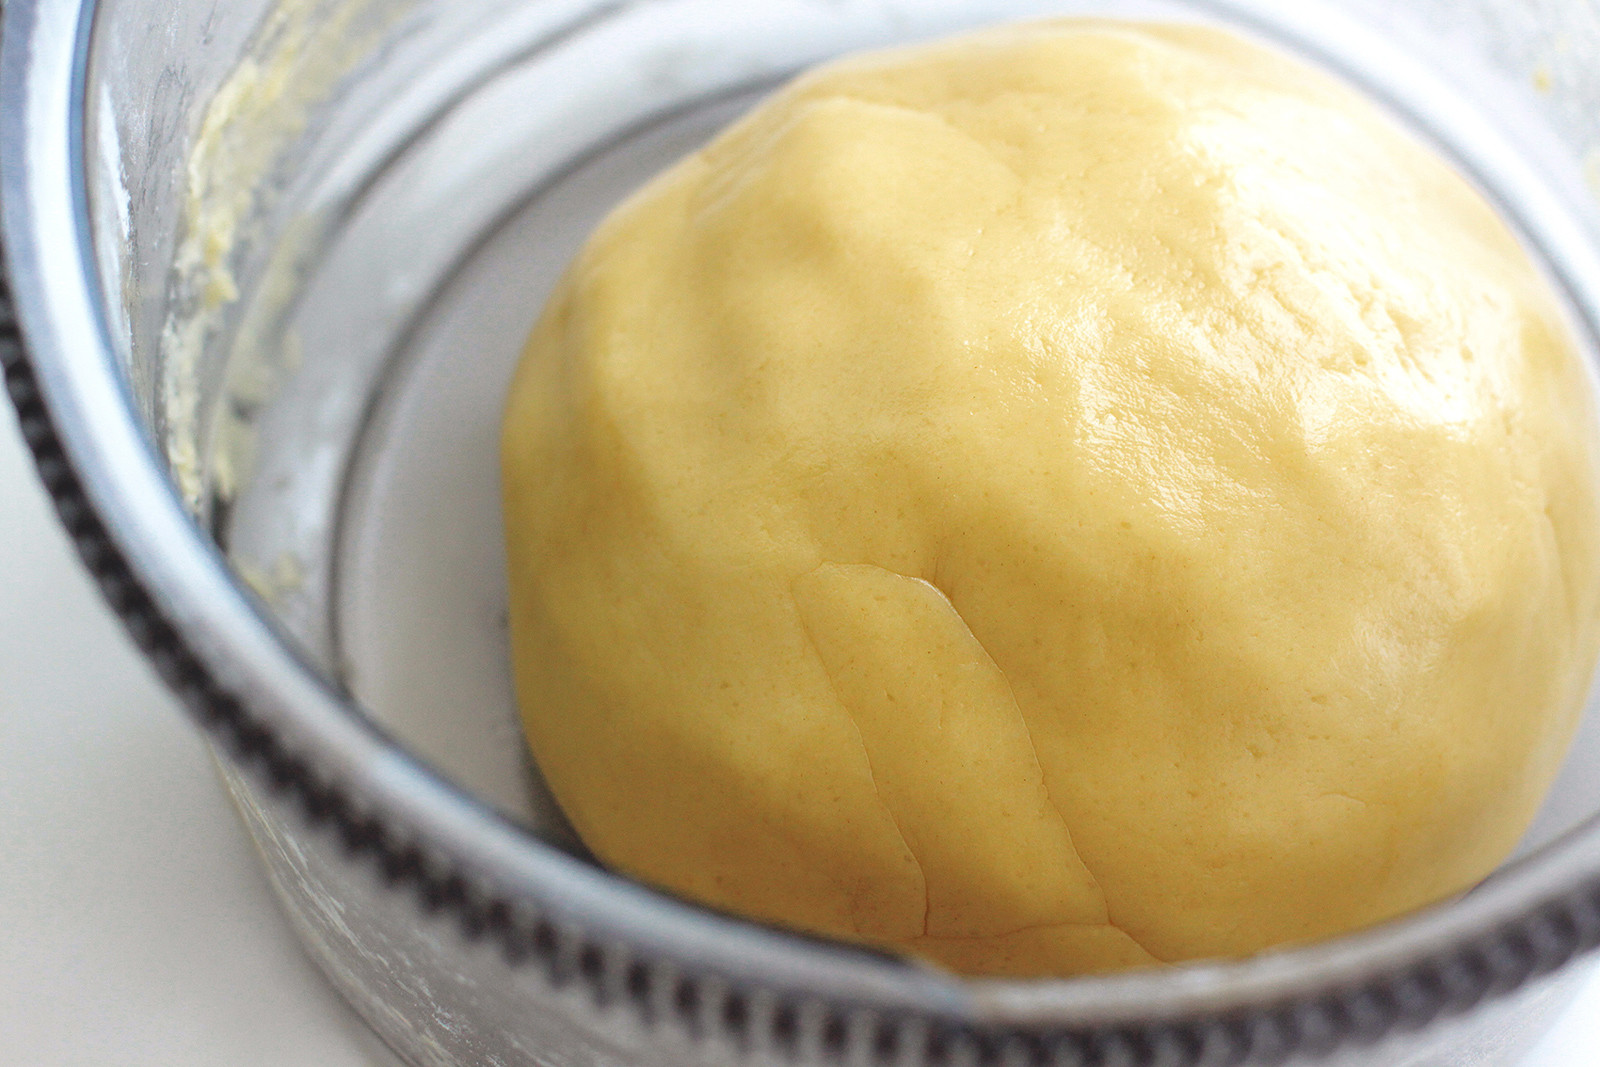
3. You should get a non-sticky but still quite soft pastry that holds its shape. Round it into a ball and leave in the fridge for 40 minutes to chill.
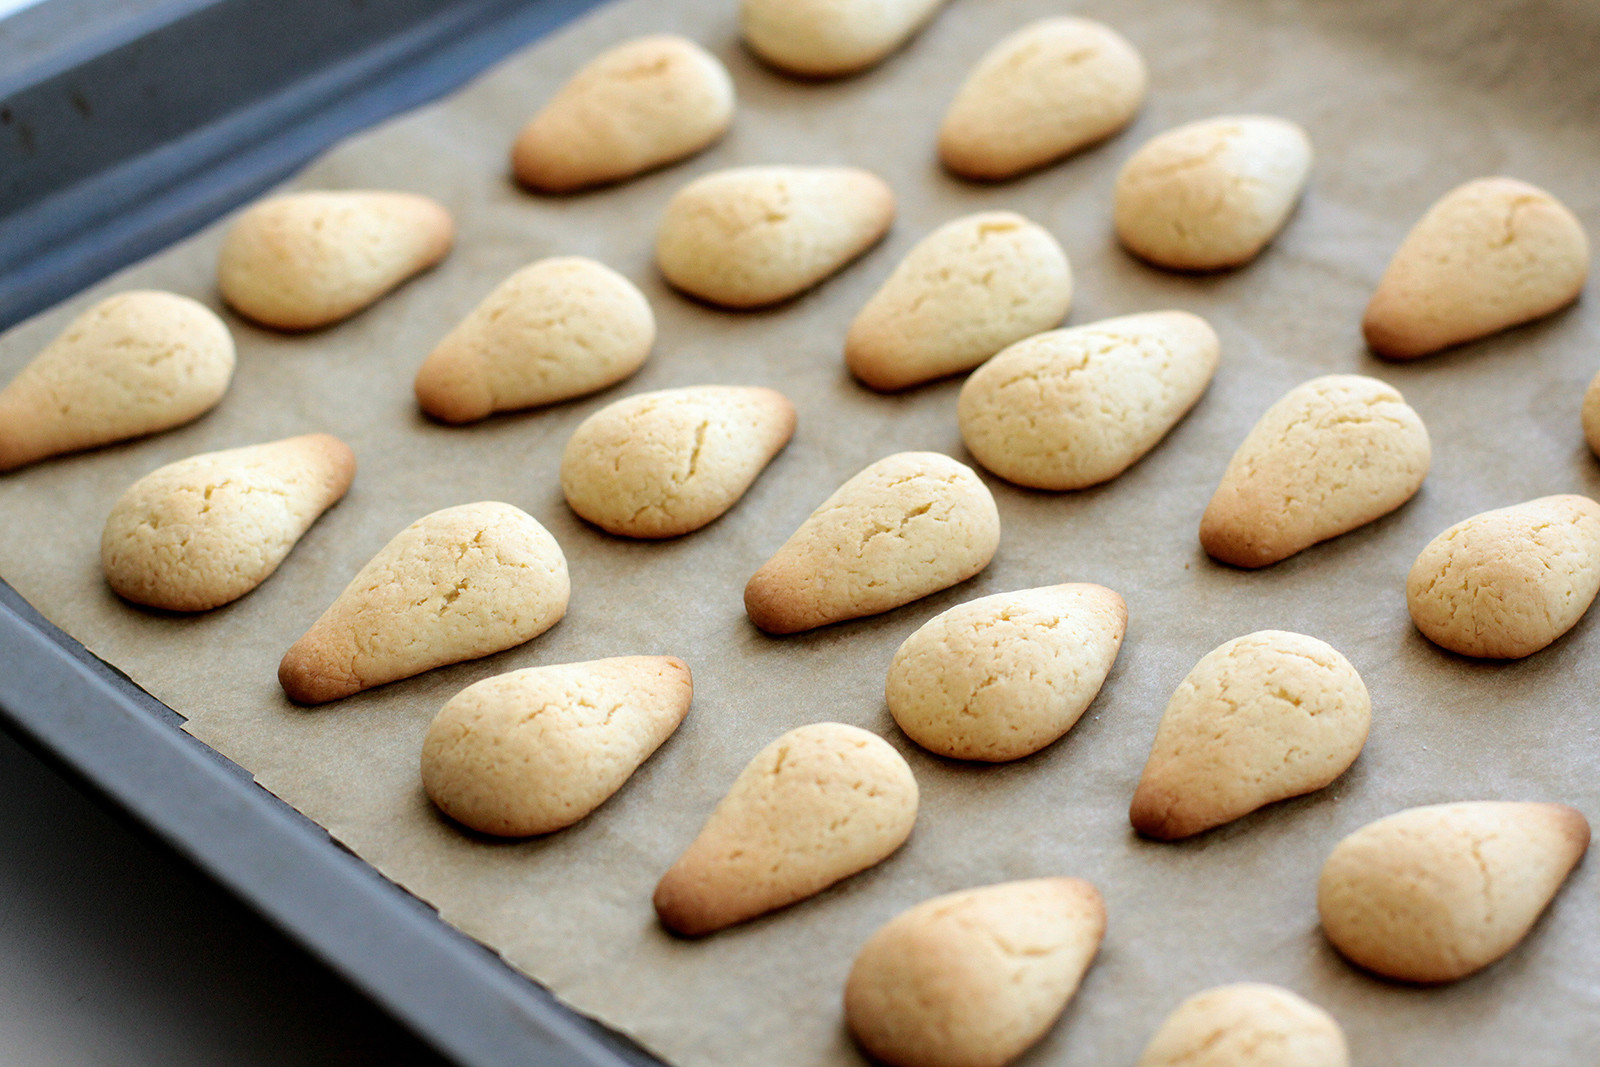
4. Thereafter, separate the pastry in two and start working with the first piece – this will suffice for the mushroom “caps”. With floured hands and a knife, separate the pastry into 20-22 equal pieces. Round them and place on the prepared baking pan covered with a sheet of parchment.
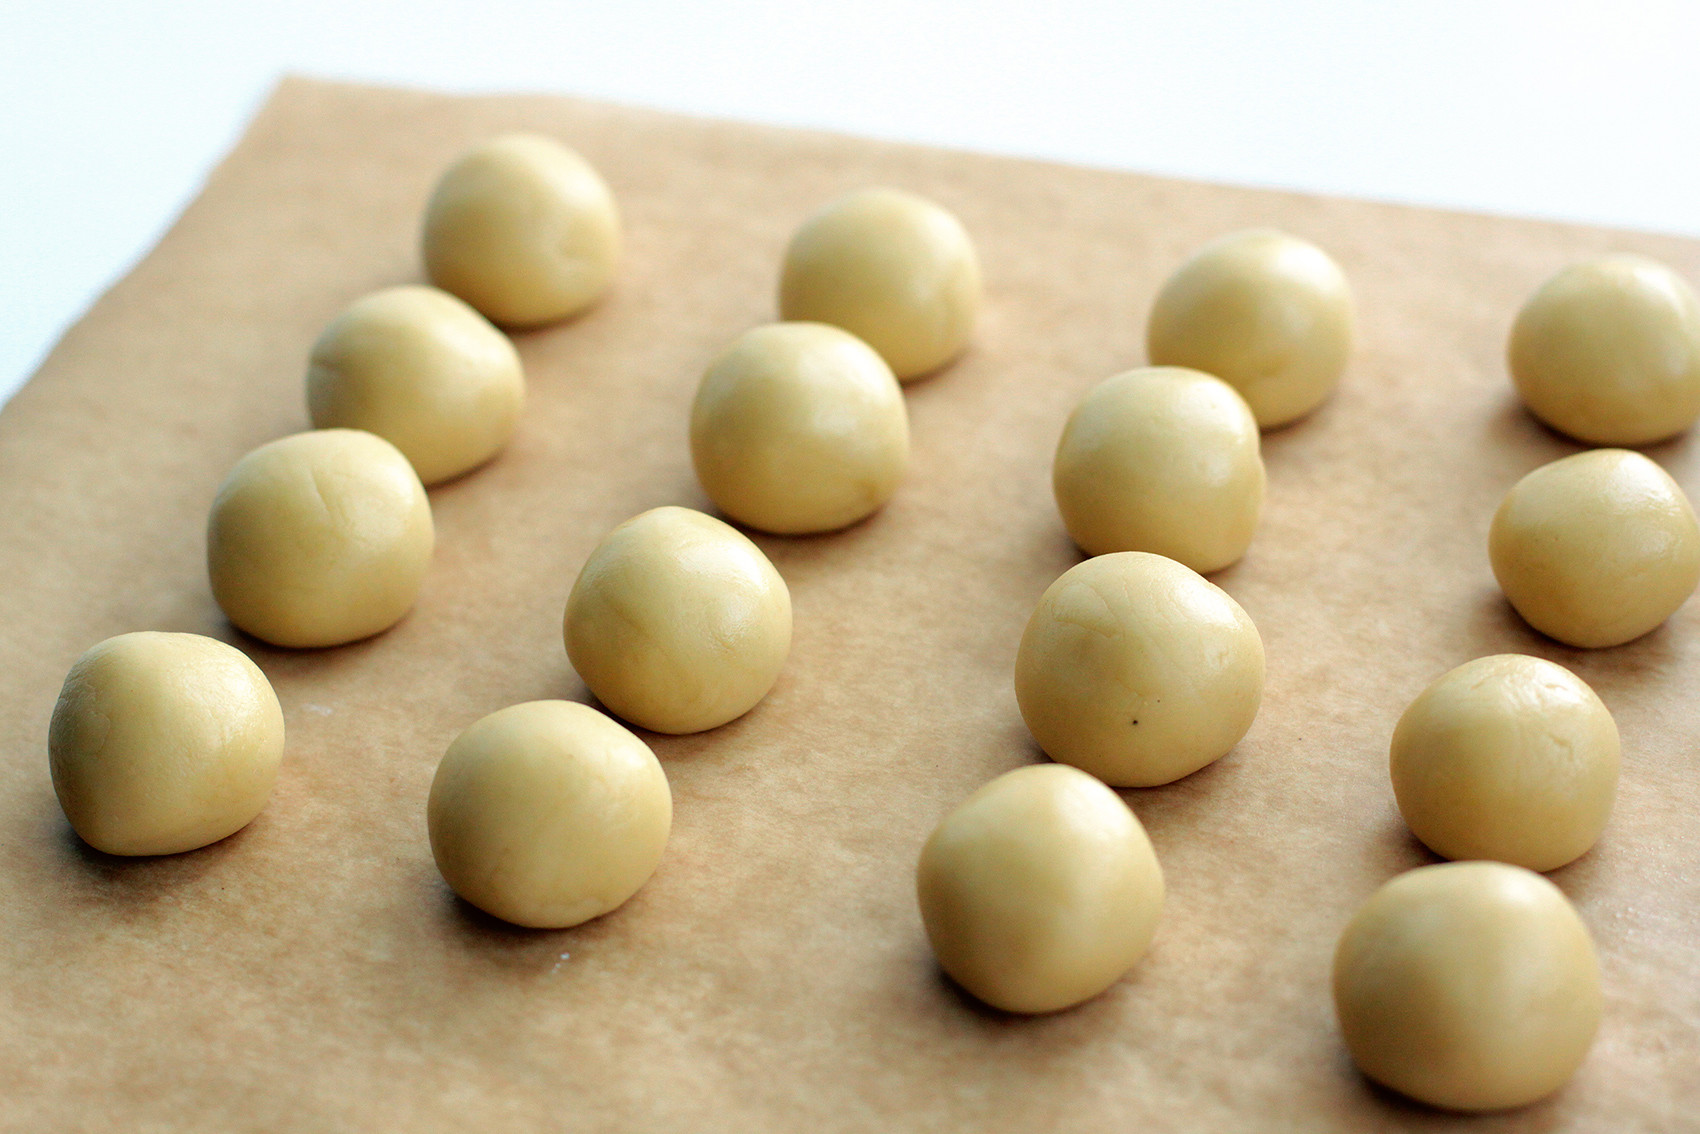
5. Slightly flatten the balls to create a more realistic caps shape. Also, put a small round piece of baking parchment or foil in the middle of each cap bottom to make holes for the mushroom “stems”.
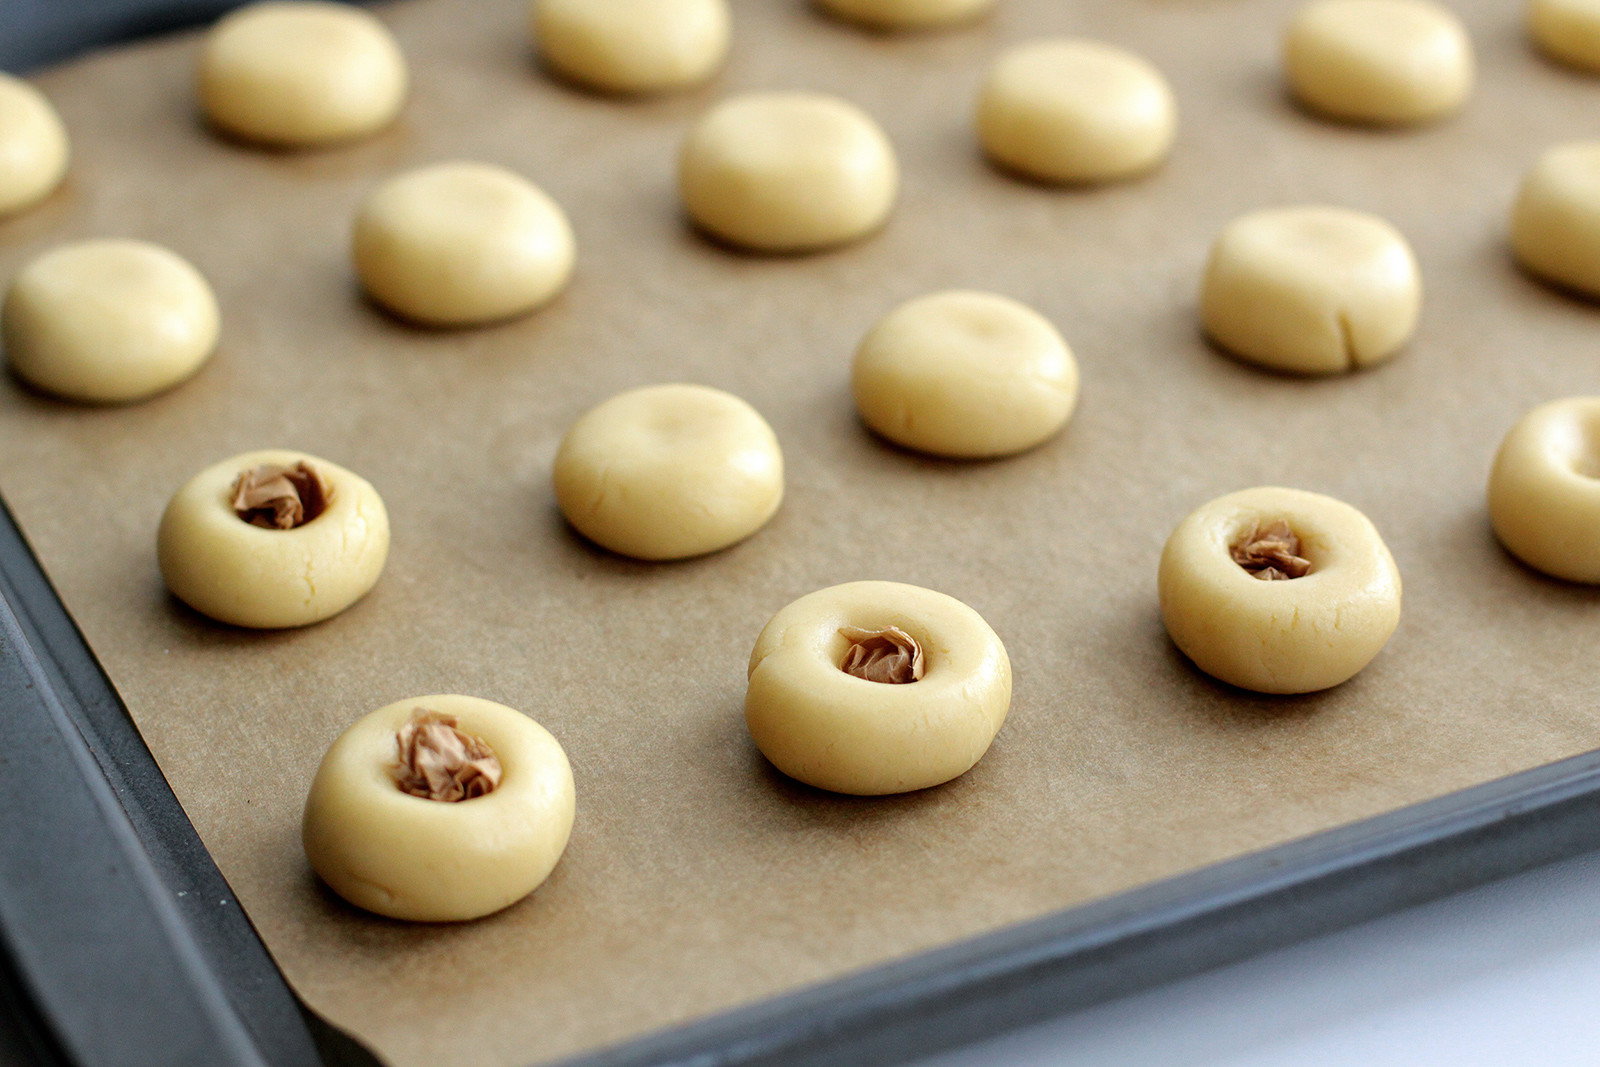
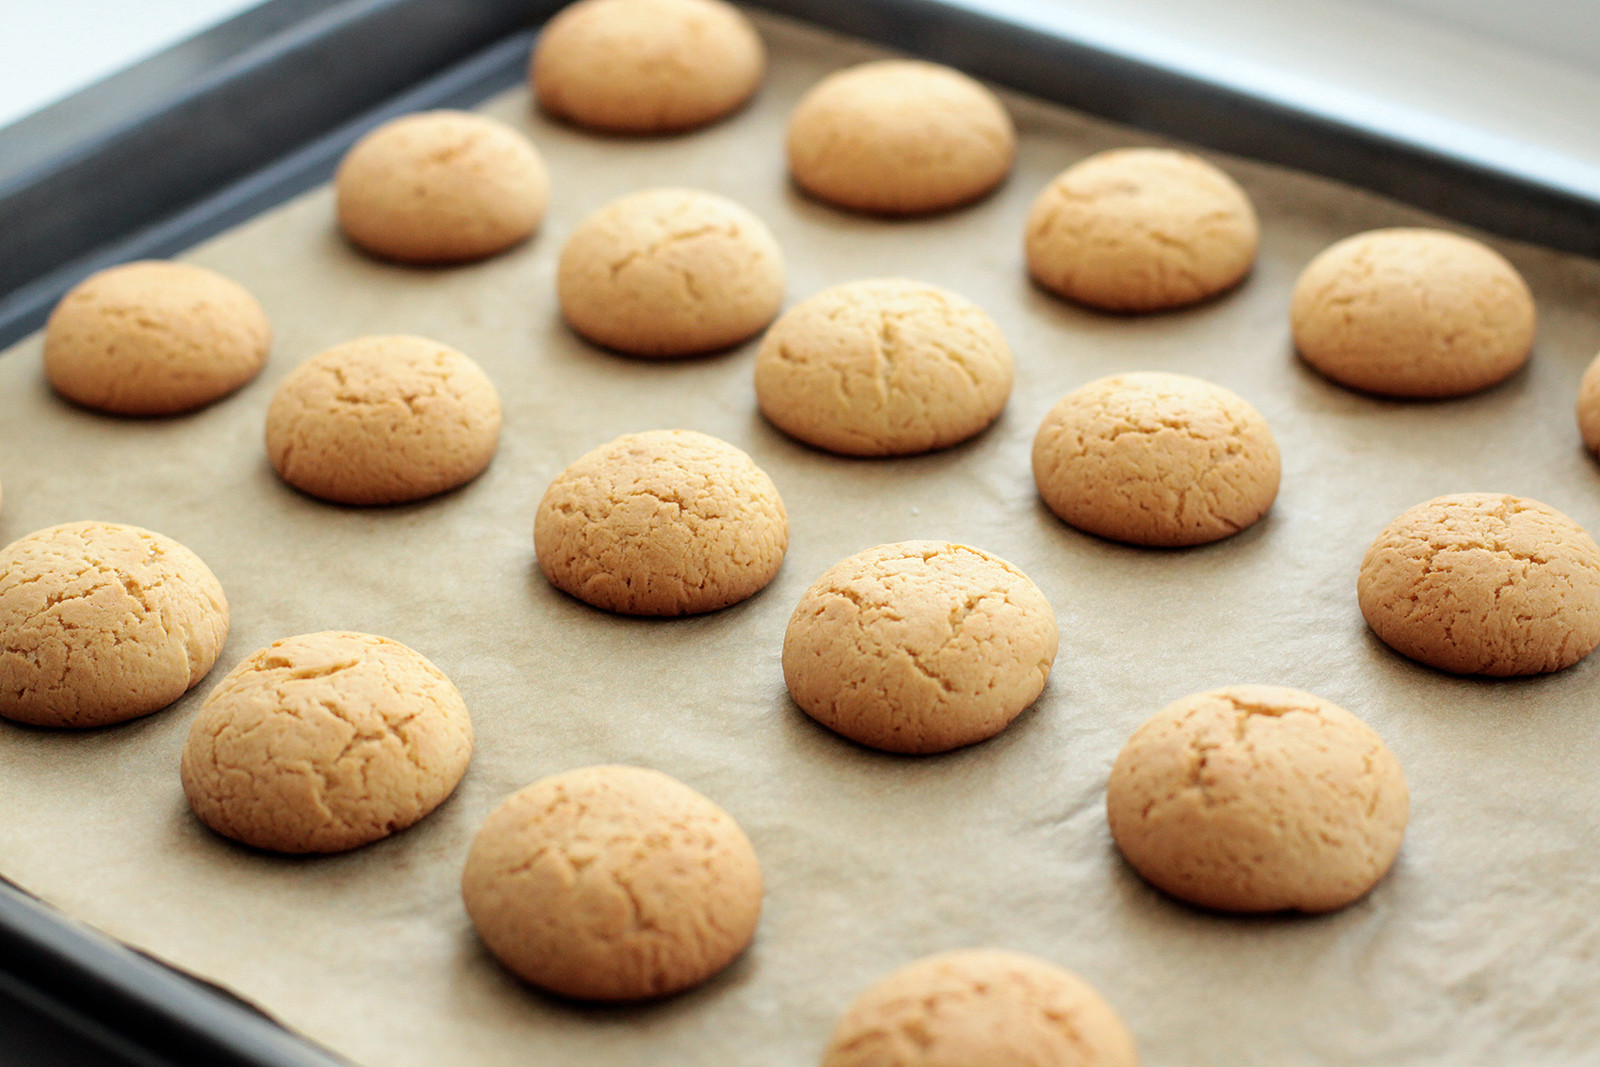
6. Bake the caps bottom side down for 12-20 min at 190°C until slightly brown. Remove the pieces of parchment from the caps bottom and let them cool down completely.
7. Now, work with the second part of the pastry: shape it into the same amount of stems as the caps and lay out on a sheet.
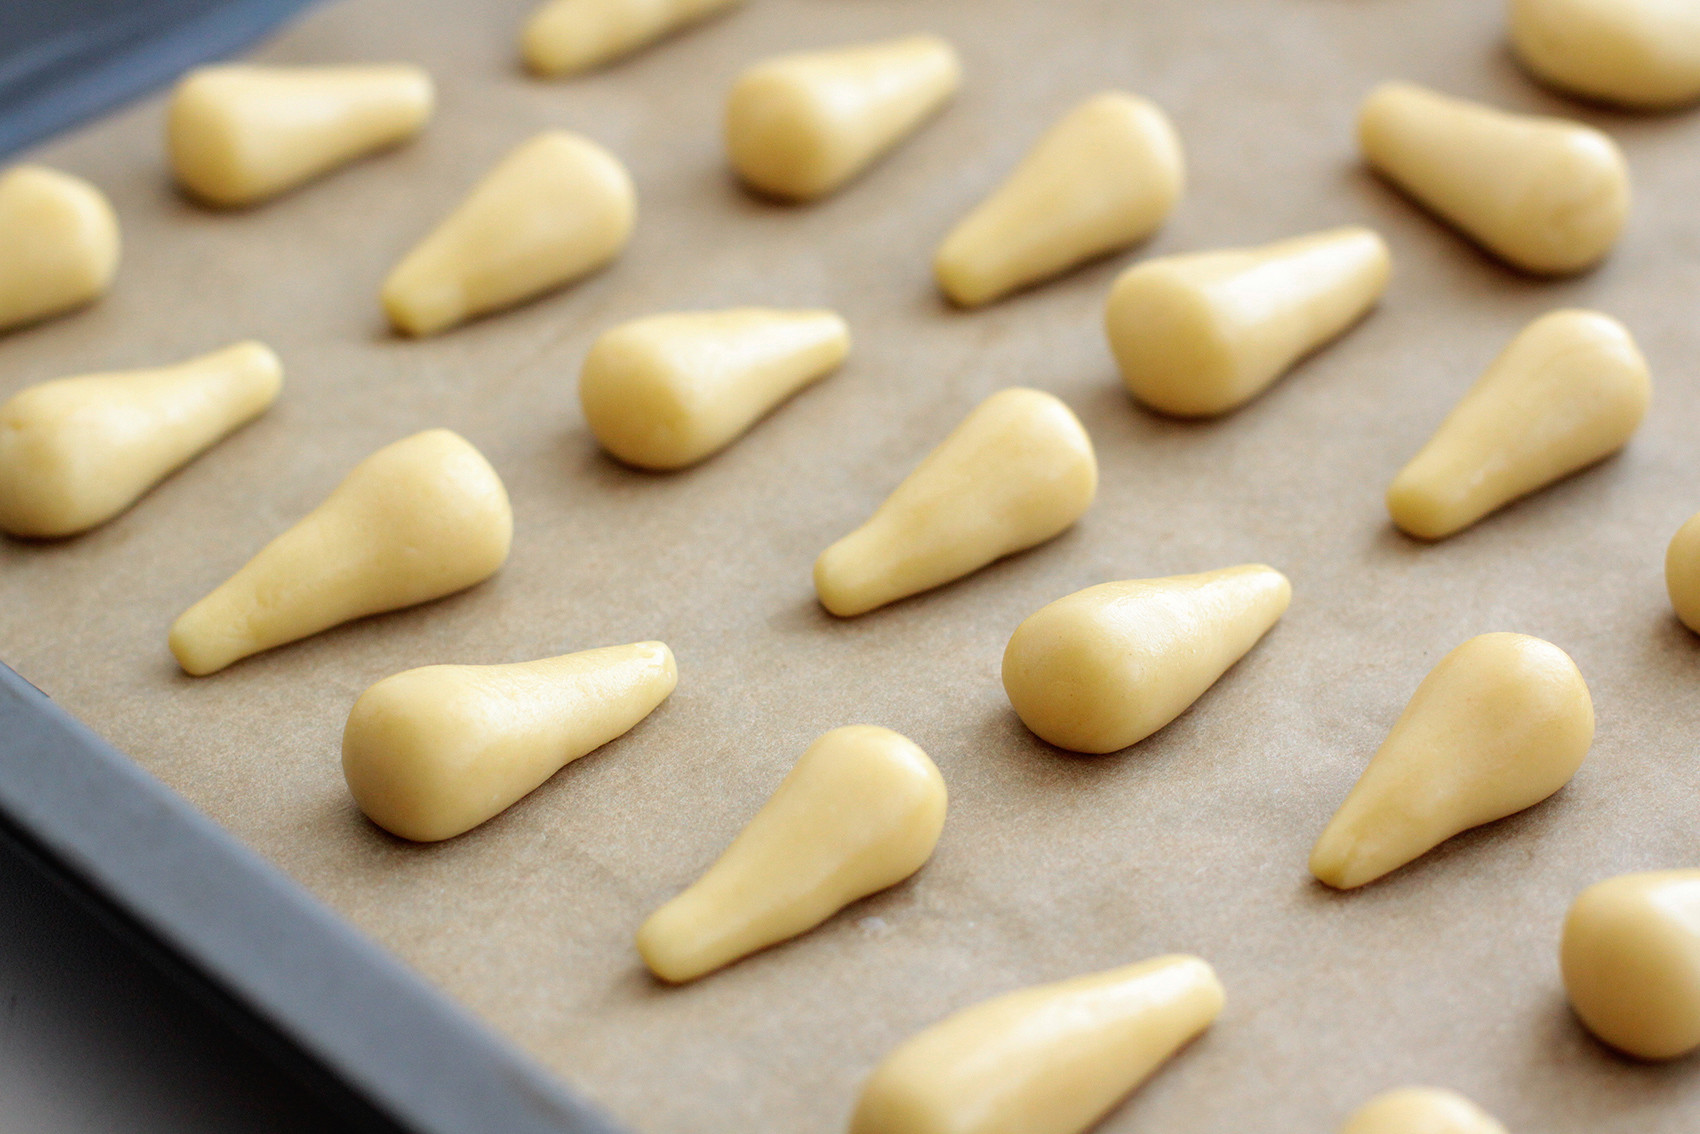
8. Bake the stems for around 10-15 minutes, take out of the oven and set aside to cool.
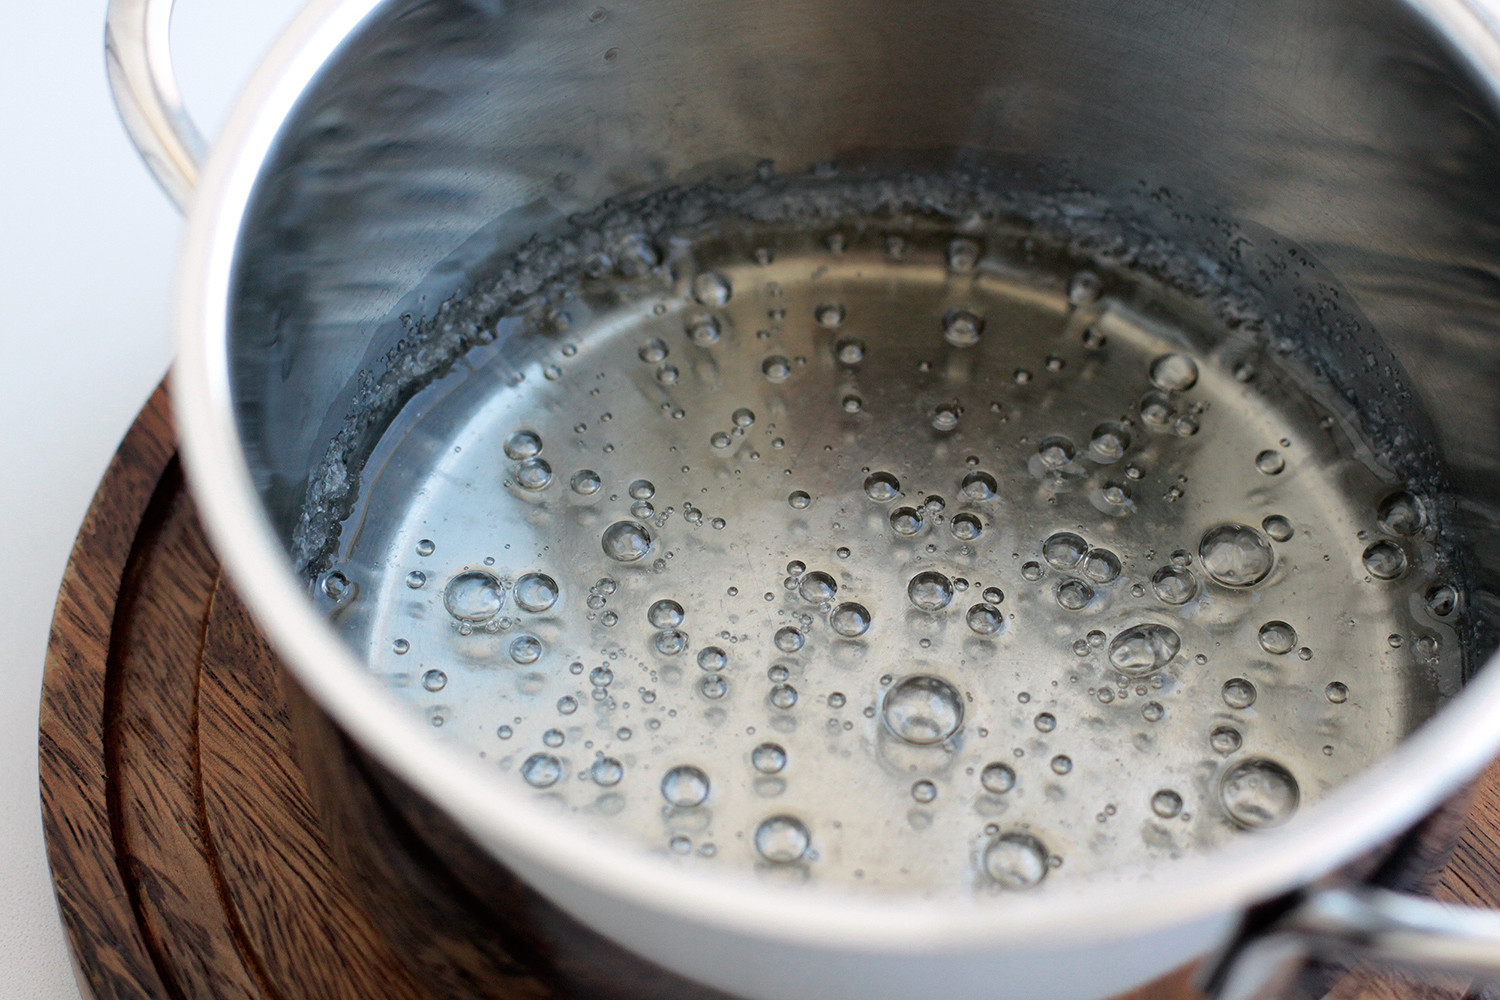
9. Meanwhile, prepare the sugar syrup – this acts as a kind of “glue” for the caps and stems. In a pot combine sugar with water and bring to a boil on medium heat. Simmer for around 5 minutes and remove from heat.
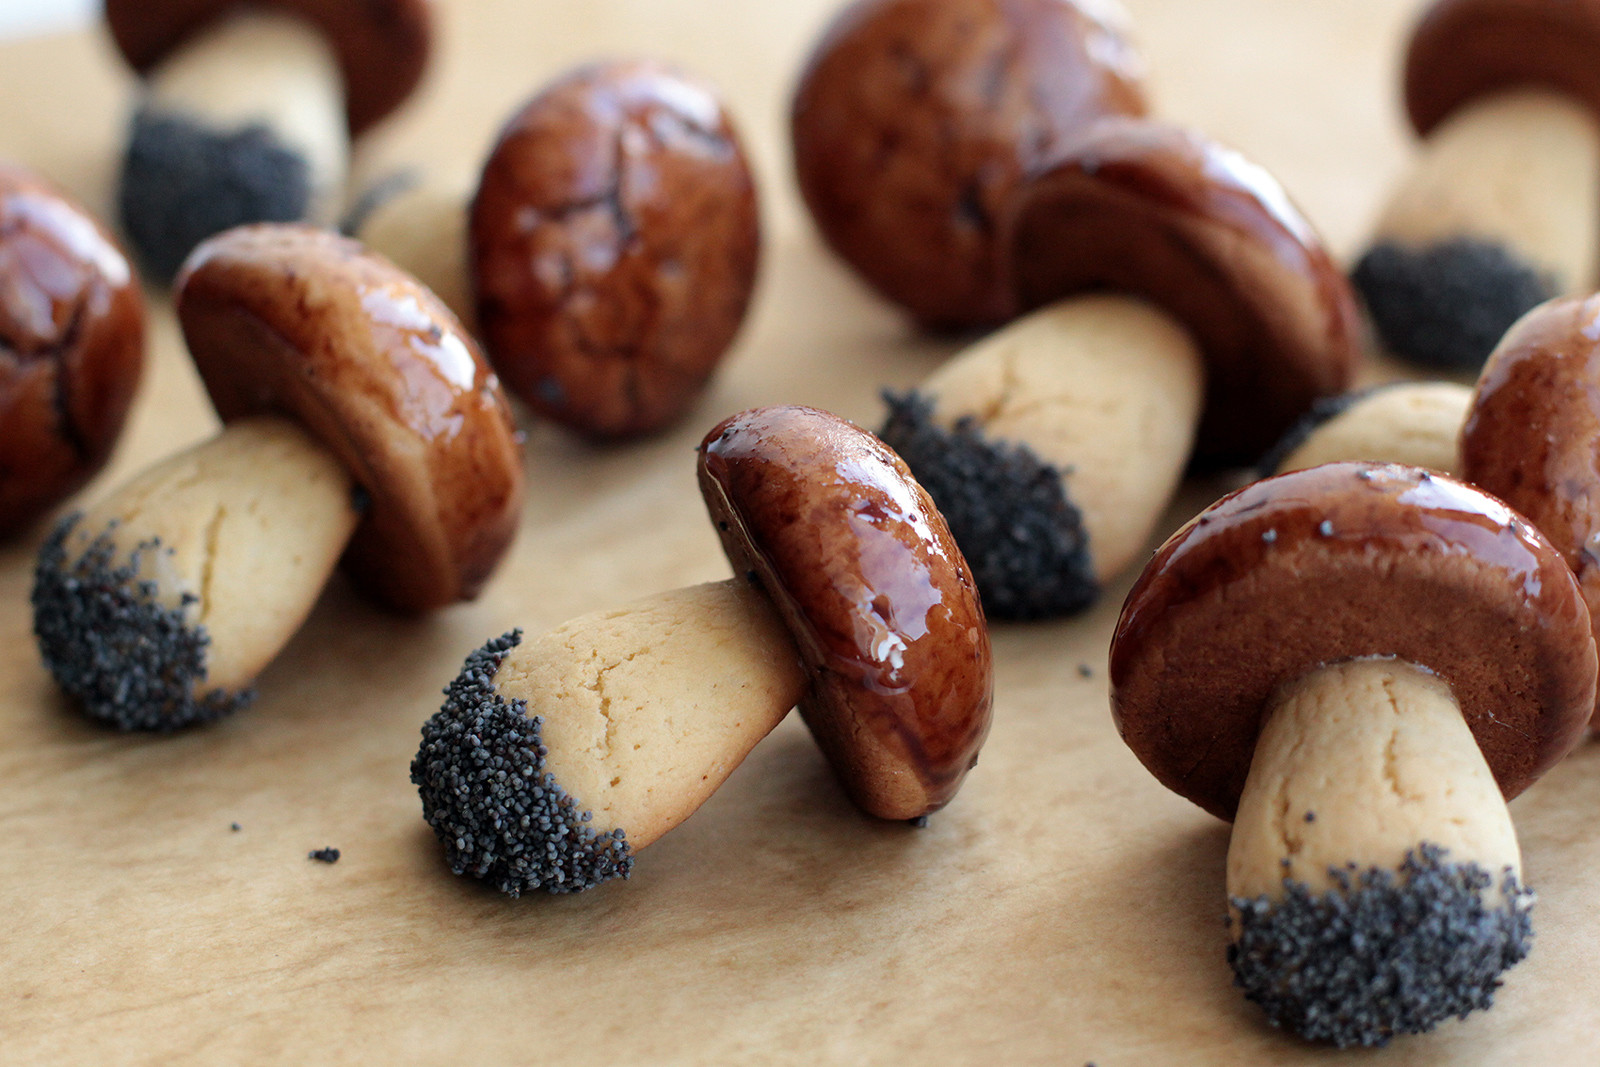
10. Now you can finally make mushrooms from the caps and stems: dip the tip of a stem in hot sugar syrup, lightly press it into a cap’s hole and wait for a couple of seconds until the syrup sets.
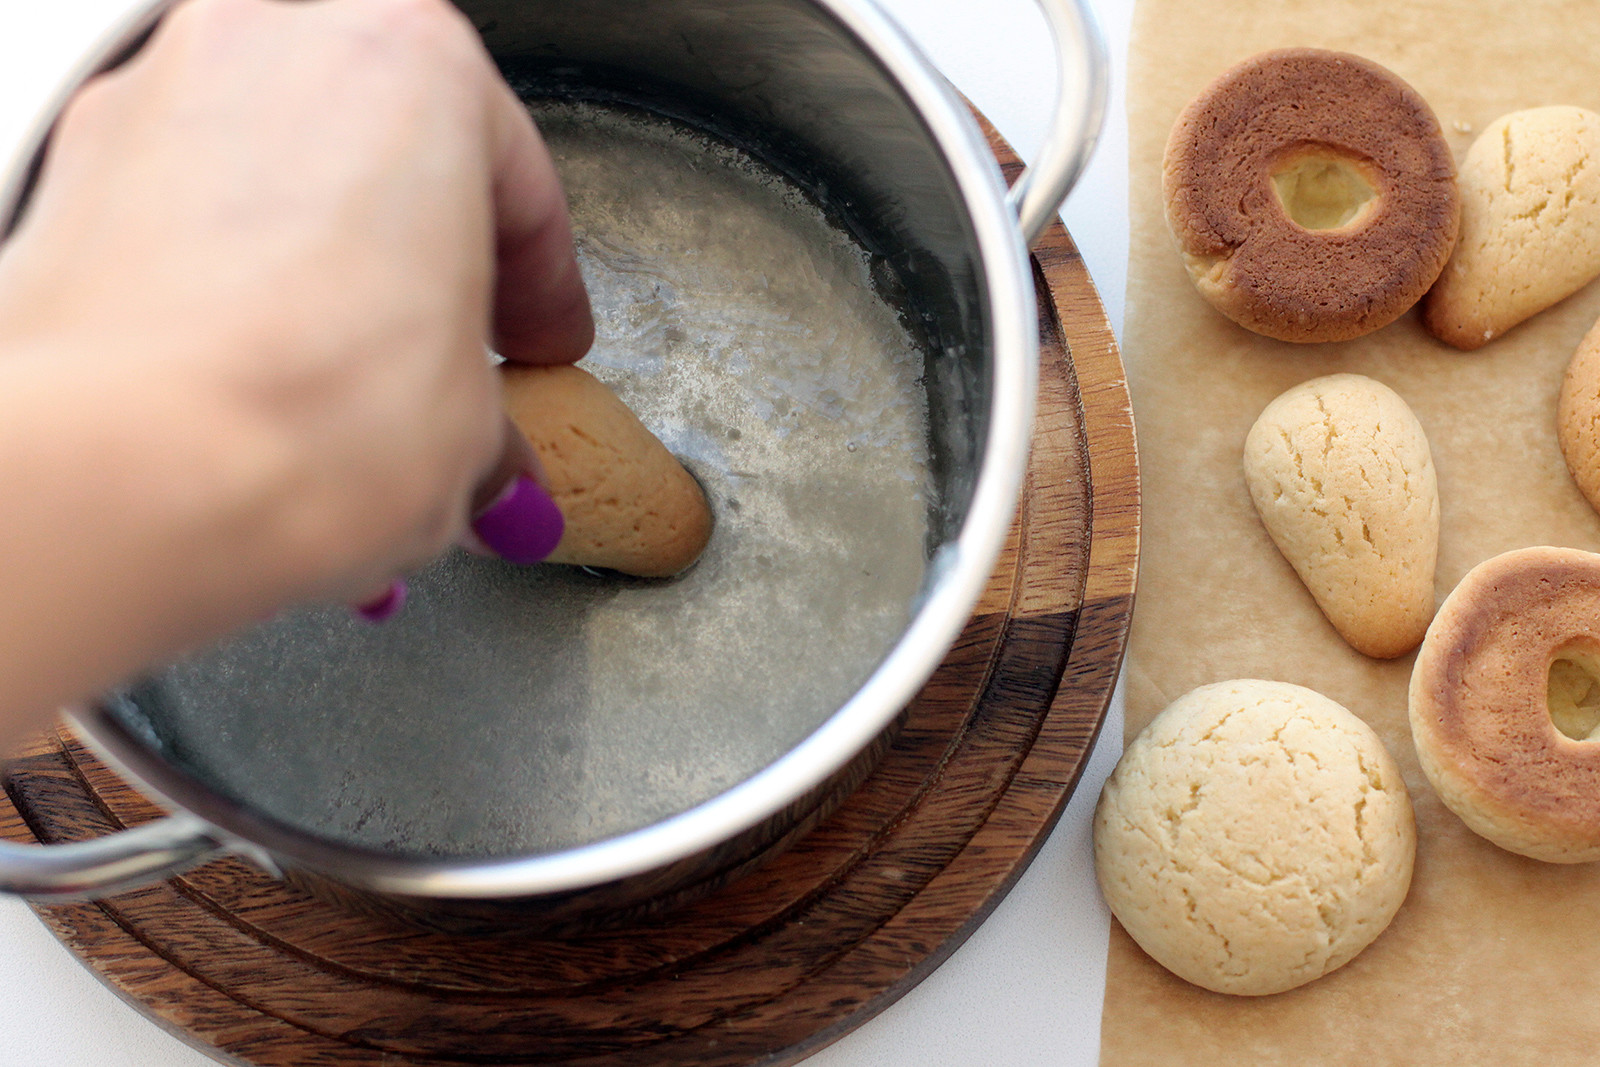
11. Repeat the process with all the pieces. The sugar syrup is extremely hot so be very careful at this point.
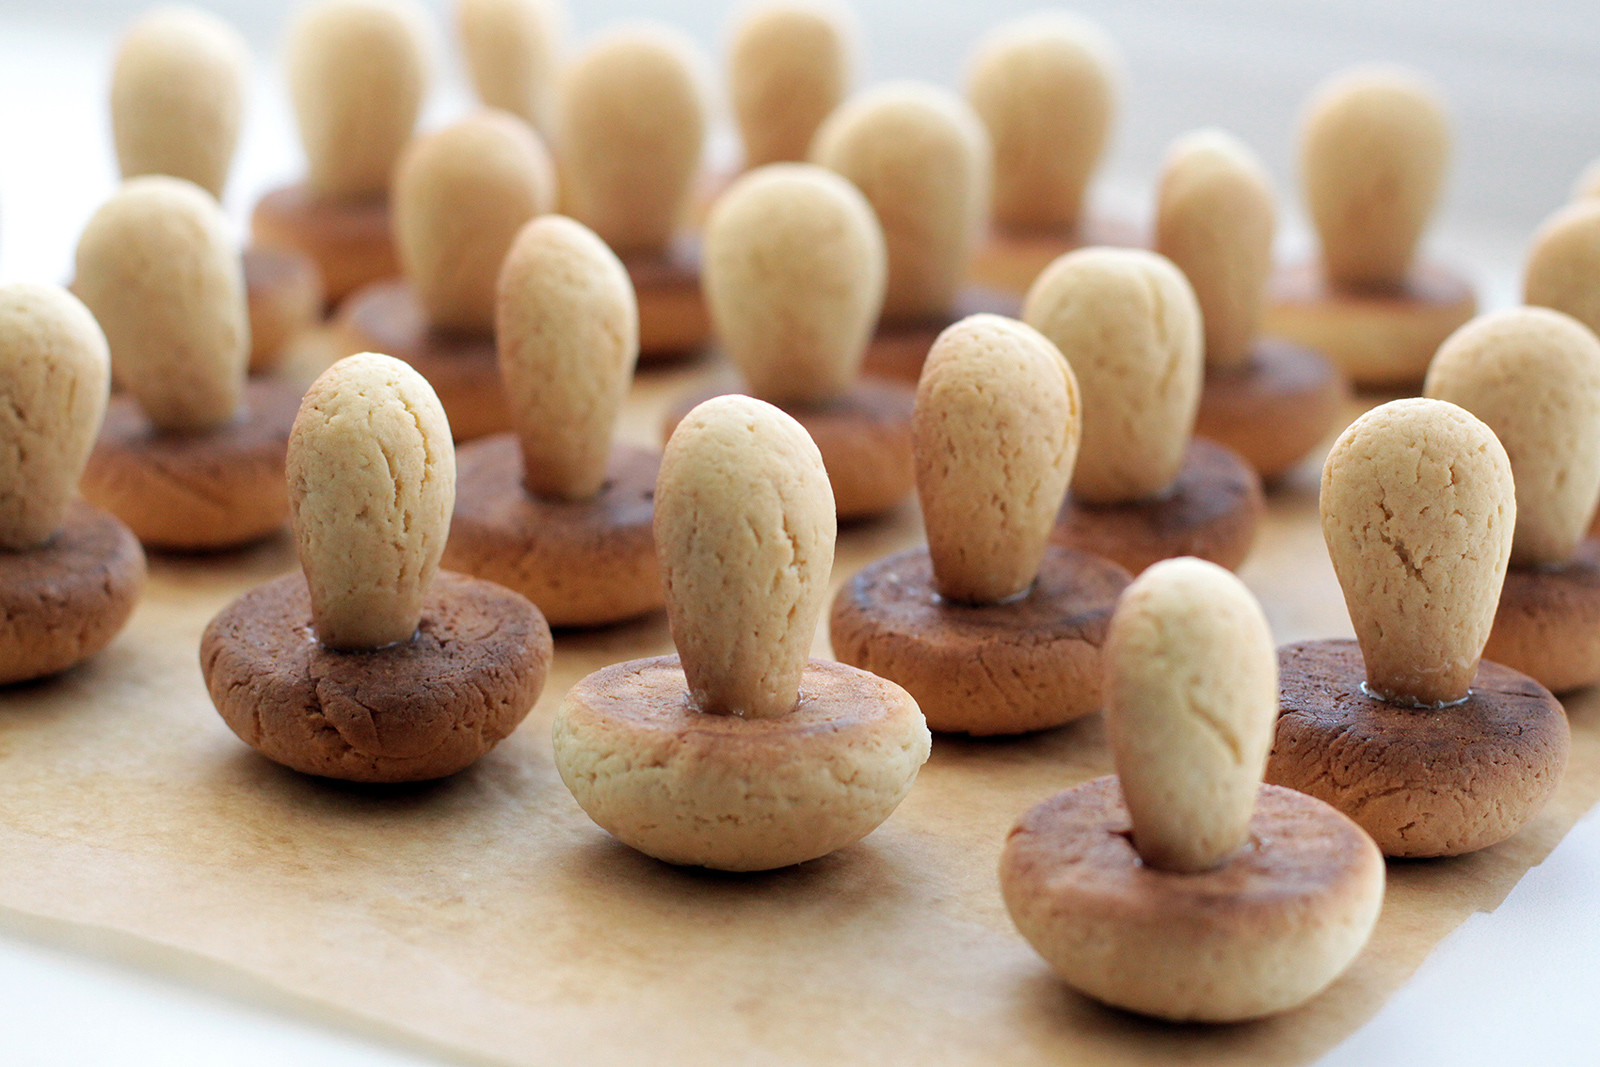
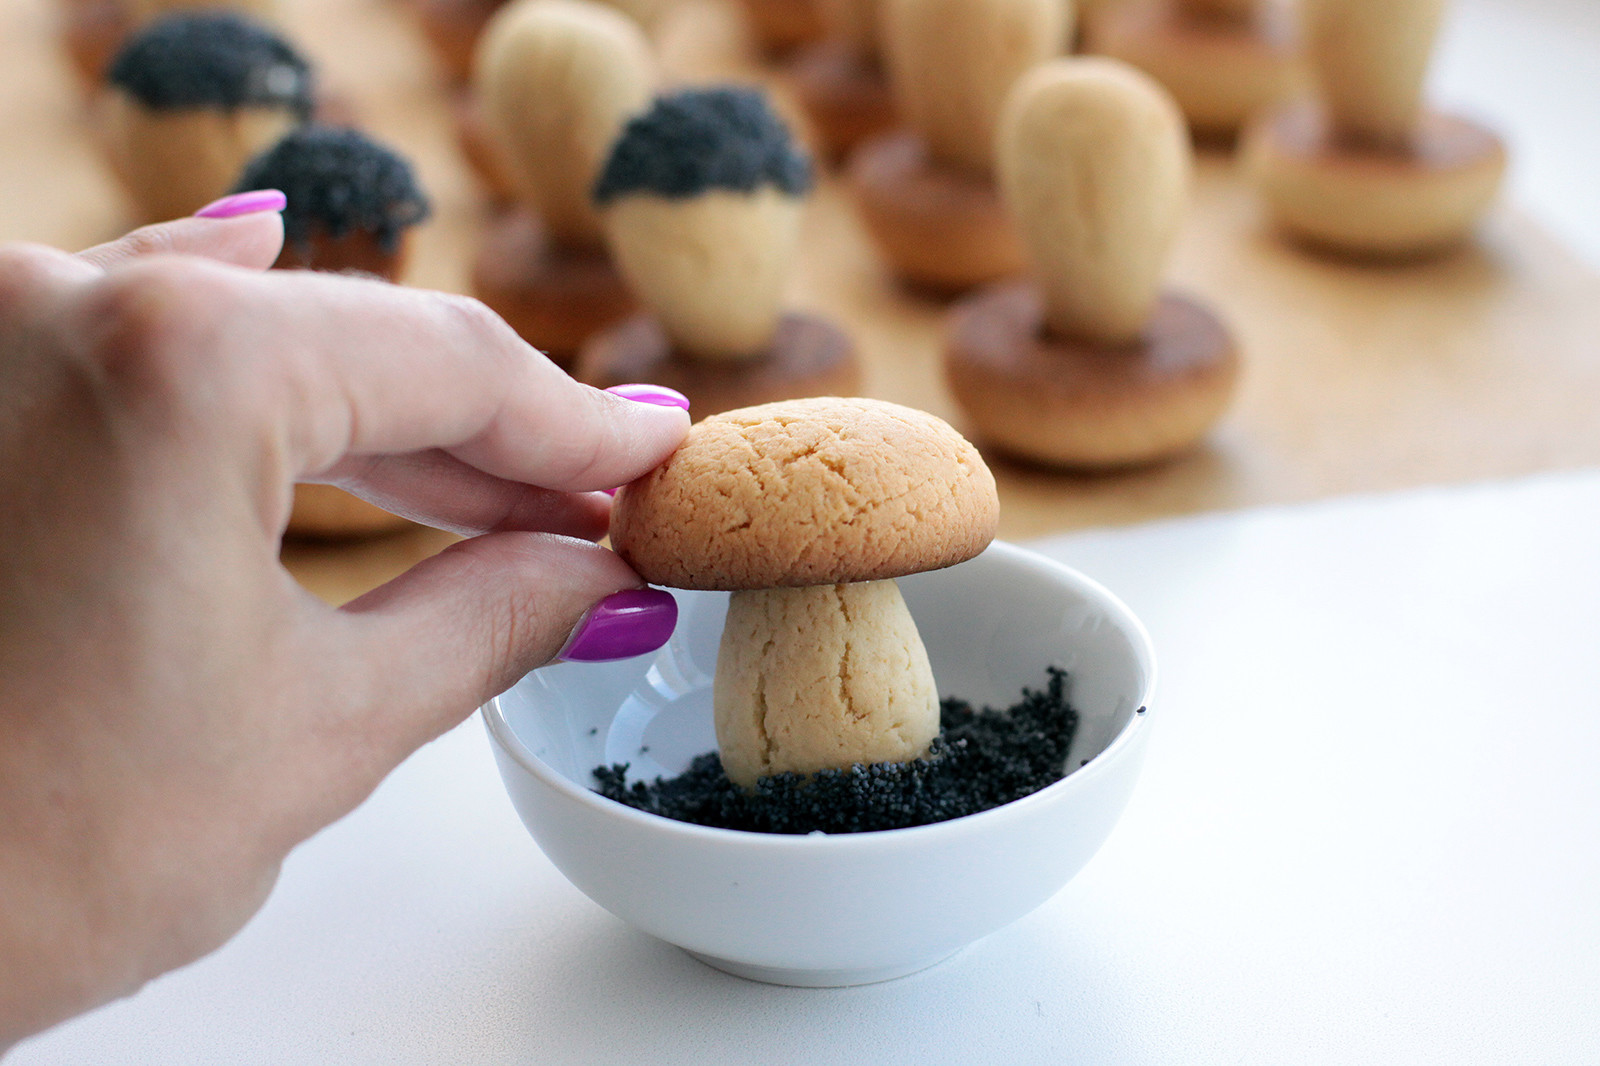
12. Now prepare a saucer with poppy seeds, dip the bottom of the mushroom stems into the syrup and then cover with poppy – this creates an effect of “ground” on the mushroom stems.
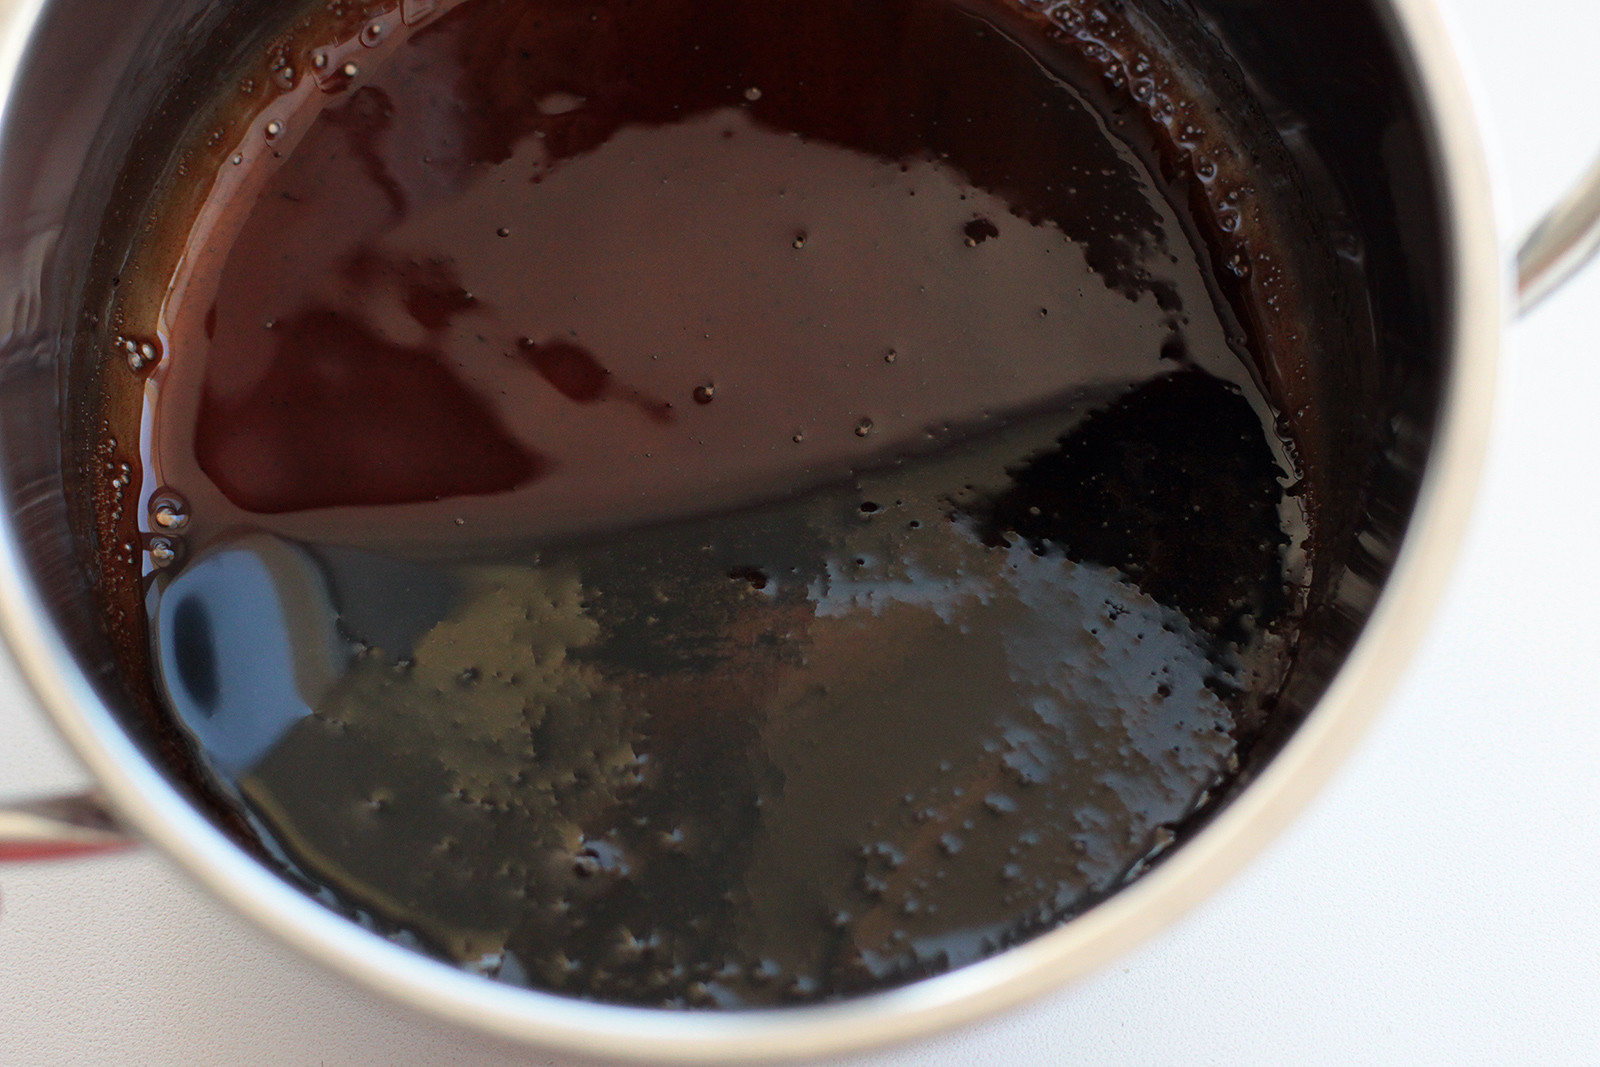
13. The last step is decorating the caps: add cocoa powder and 1-2 tablespoons of water into the remaining sugar syrup, mix until smooth, simmer for a minute or two and remove from heat.
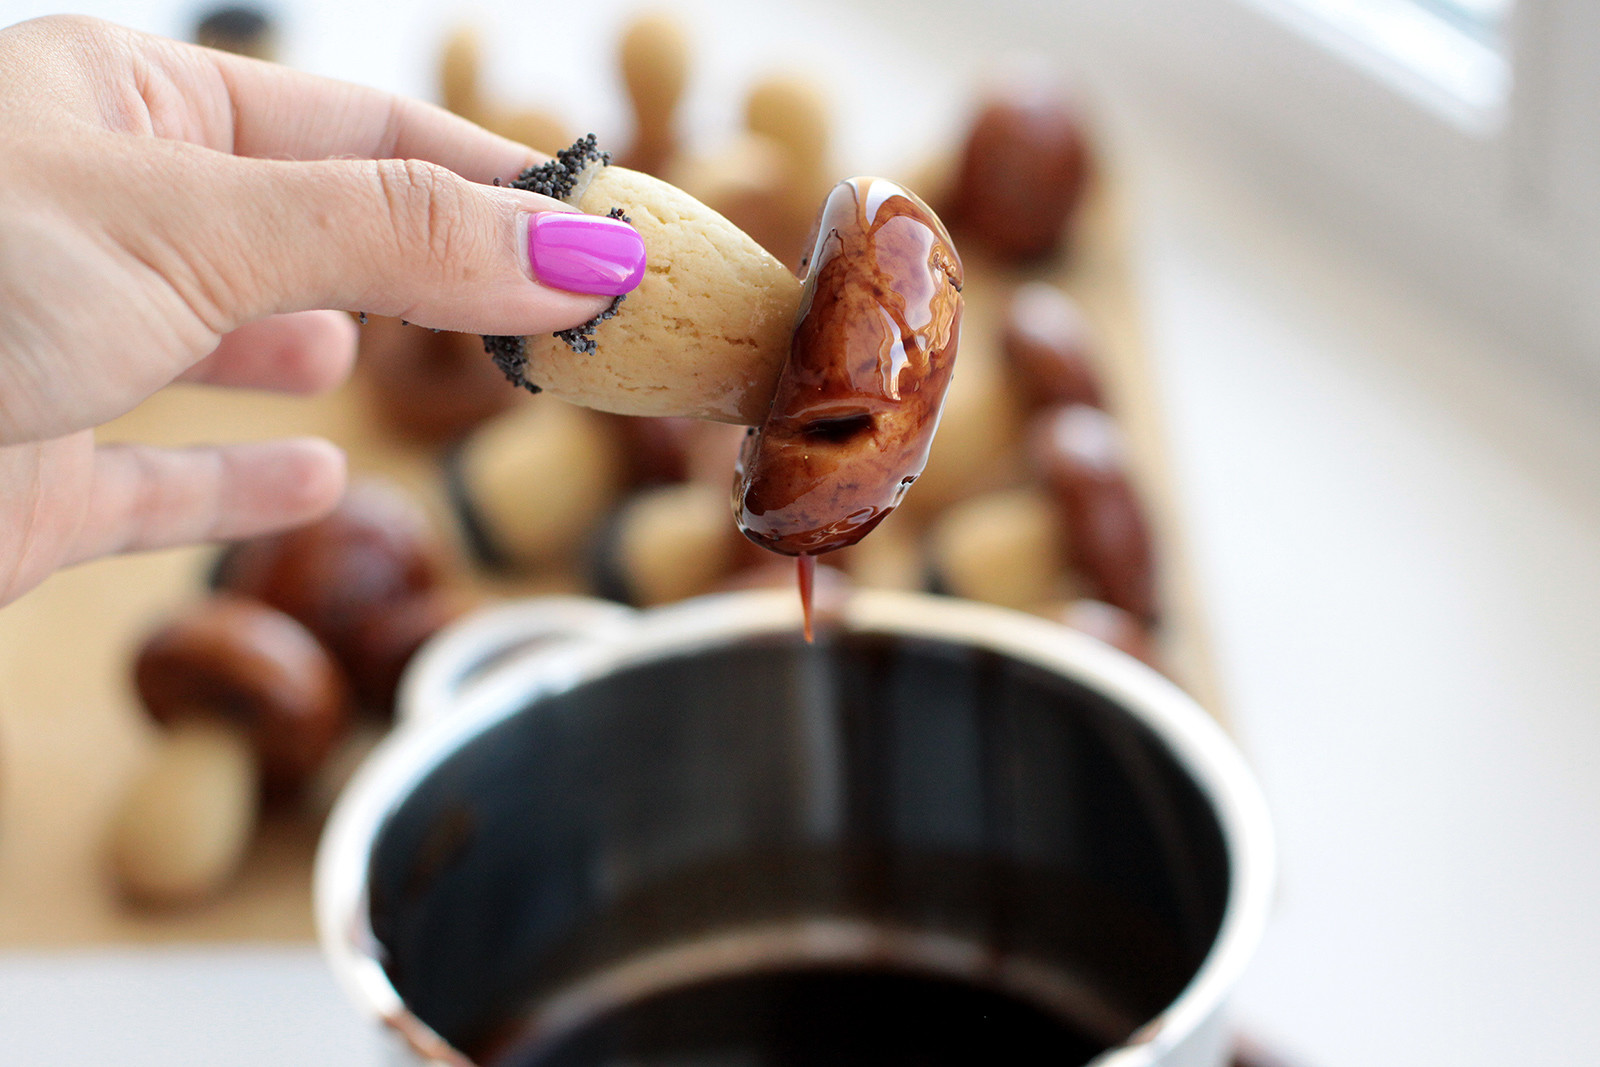
14. Dip each mushroom cap into the hot cocoa glaze, let it drip and carefully place on a dish to set completely.
15. Enjoy the cookies immediately, or keep them in the fridge. Priyatnogo appetita!
Read more: Inspired by Russia’s greatest commander, Suvorov shortbread cookies are a blast
If using any of Russia Beyond's content, partly or in full, always provide an active hyperlink to the original material.
Subscribe
to our newsletter!
Get the week's best stories straight to your inbox