How to make a delicious meringue cake, Soviet style
Earl ruins cake was supposedly adored by Soviet leader Leonid Brezhnev.
Victoria DreyBy far my favorite cake in childhood, I remember asking my grandma to make Earl Ruins each year for my birthday party. She made an enormous epic cake that was a hit dish on the holiday table. I always considered it to be one of the most delicious cakes of all time, so it was a real surprise when grandma told me they couldn’t buy it anywhere : “The only way you could taste it was to make it at home”.
Women often shared the recipe among each other, and, Earl Ruins became one of the most popular homemade cakes. Even though today you can find it in Russian shops and bakeries, grandma’s homemade Earl Ruins is still the one and only for me.
No one knows for sure when and who first came up with Earl Ruins recipe, but many call it the ‘younger brother’ of Kiev Cake. They truly are similar: both have a meringue base, nuts and chocolate cream. But the authentic Kiev Cake is more difficult to make, so there’s a common belief that Earl Ruins is an easier alternative that even a beginner can master.
This cake was supposedly adored by Soviet leader Leonid Brezhnev: meringue desserts were one of his favorite; so, Earl Ruins was probably the masterpiece of Brezhnev’s confectioners.
The origins of the name is unclear, but many people believe it owes to the fact that the shape of the cake resembles the ruins of a castle. If you’re a Soviet supporter, you might want to believe that these ‘ruins’ were the result of a peasant and worker uprising.
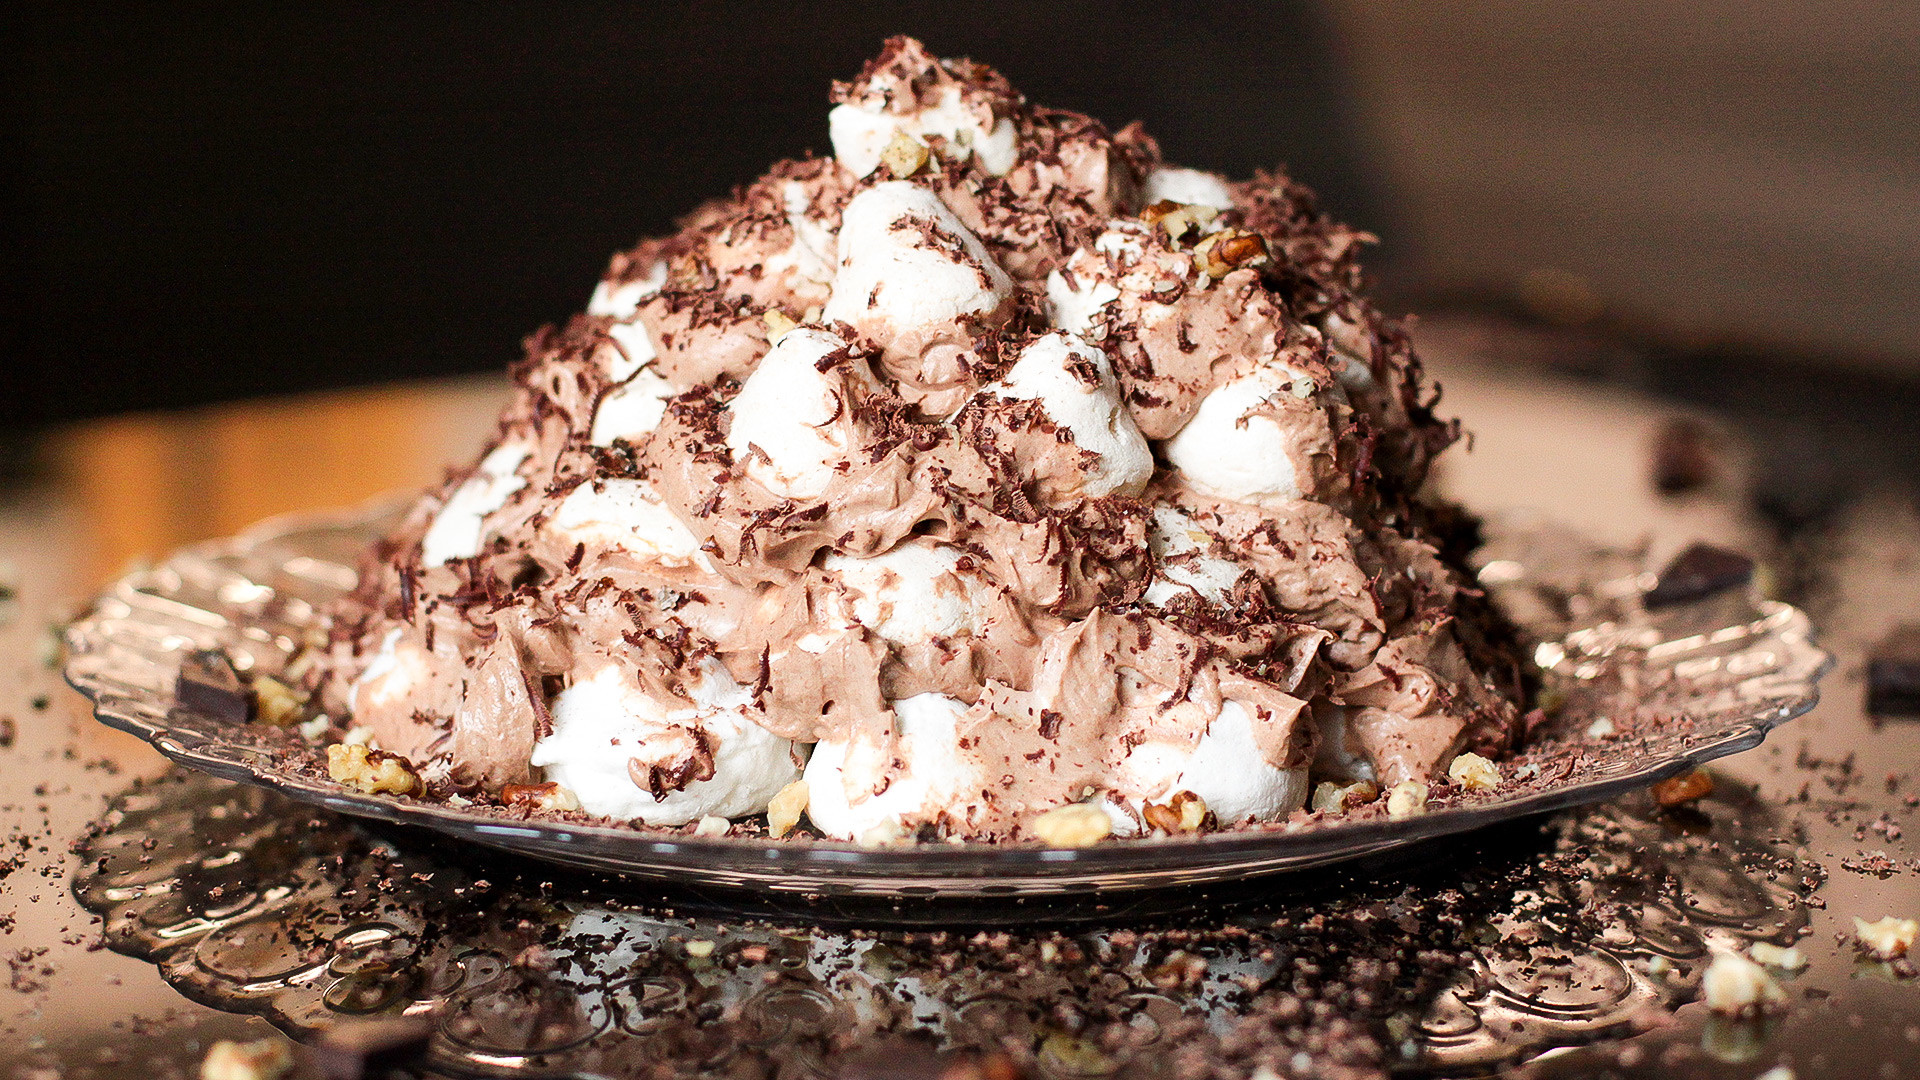
Whatever the case, it’s one of the most delicious and unique cakes I’ve ever tried. Imagine crunchy meringues covered in buttery soft cream with a hint of cocoa – this is what Earl Ruins tastes like. Using meringue instead of regular biscuit base makes this dessert special. Since it’s very light and airy the cake usually disappears in the blink of an eye.
Ingredients for meringues:
- 3 egg whites
- 150g sugar
- a pinch of salt
Ingredients for the cream:
- 3 yolks
- 200g sour cream
- 2 tablespoon cocoa powder
- 1 tablespoon flour
- 70g sugar
- 200g butter
- a pinch of salt
- dark chocolate and nuts for decorating
Cooking:
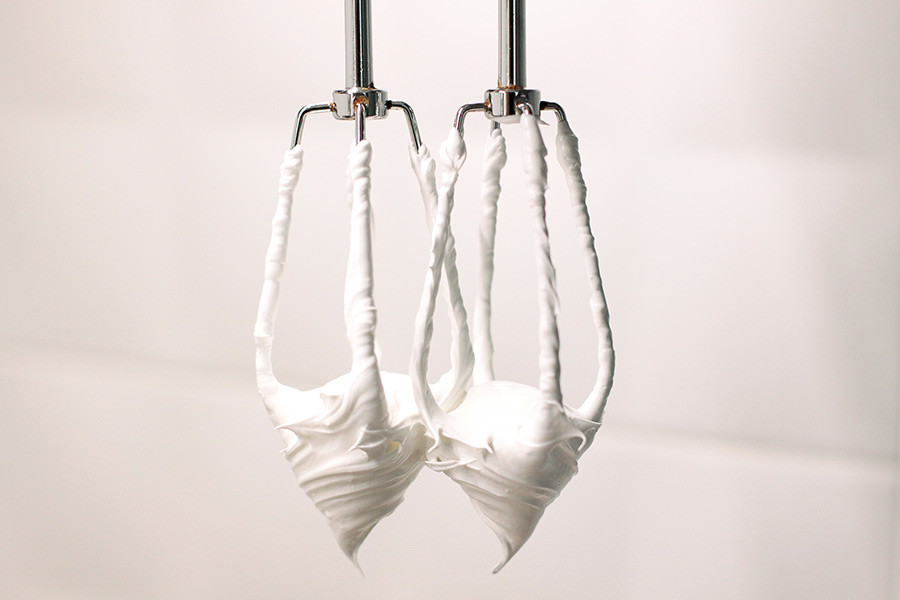
1. Before making the meringues firstly use a bit of vinegar or lemon juice to clean your bowl and whisks – this helps to remove any grease that stops egg whites from whipping up properly. Separate the yolks from the whites, put into a clean bowl and start whisking on low speed. When the mixture is foamy add a pinch of salt and continue whisking on medium speed. When the egg whites are fluffy and white, start adding sugar tablespoon by tablespoon. In a few minutes you should get a very glossy and stiff mixture with no grains of sugar.
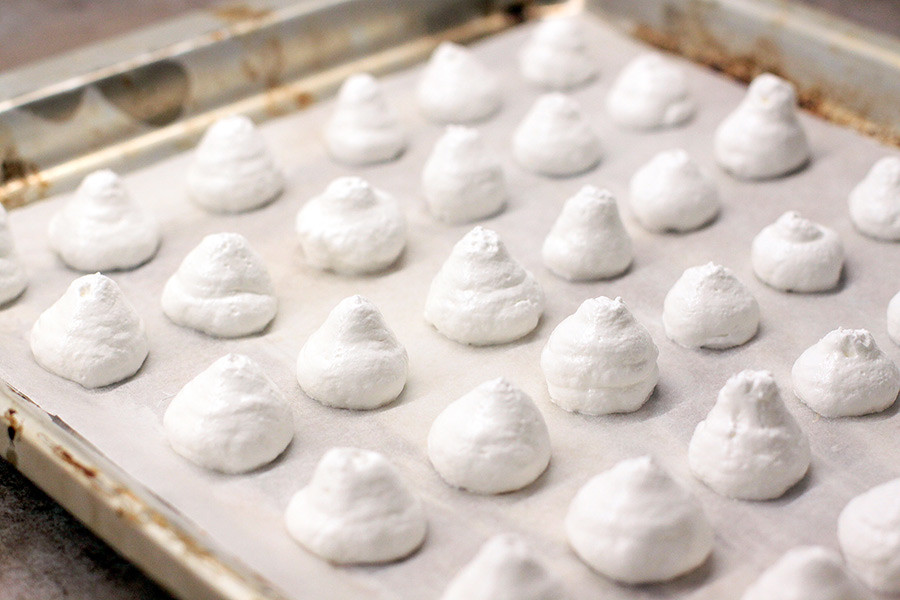
2. Then put your meringue mixture into a piping bag and squeeze out lots of small round meringues on a baking pan covered with a piece of parchment. Bake the meringues at 120°C for 60 minutes, then lower the heat to 100°C and bake for another 30 minutes. When the meringues are ready, turn off the heat and let cool inside the oven.
3. Meanwhile, make the cream for your cake. In a large bowl mix the yolks, sour cream, sugar, salt, cocoa powder and salt and put the bowl on a bain-marie.
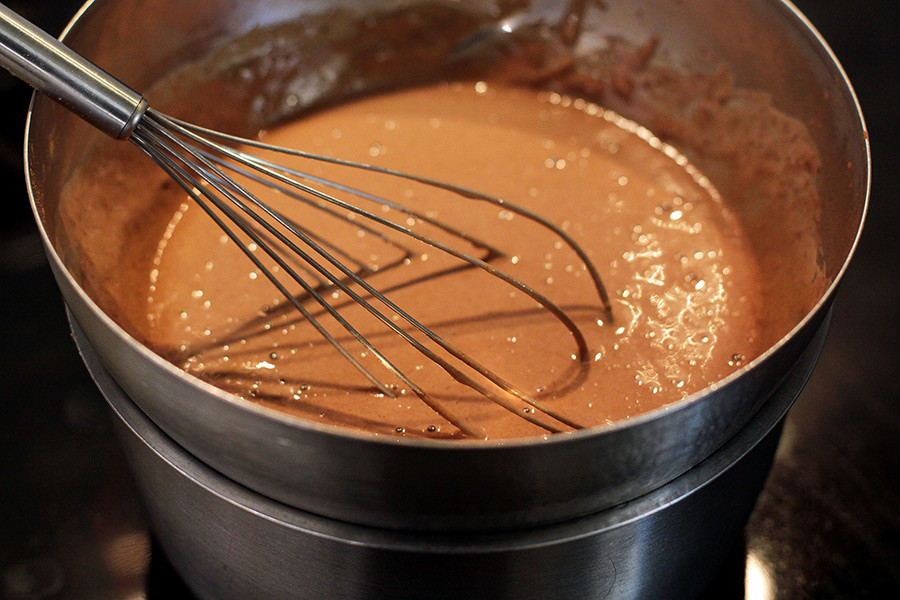
4. Constantly stir the mixture and you’ll notice how it thickens after 3-6 minutes. When the cream is thick enough, remove from the bain-marie, cover with plastic wrap and cool down completely.

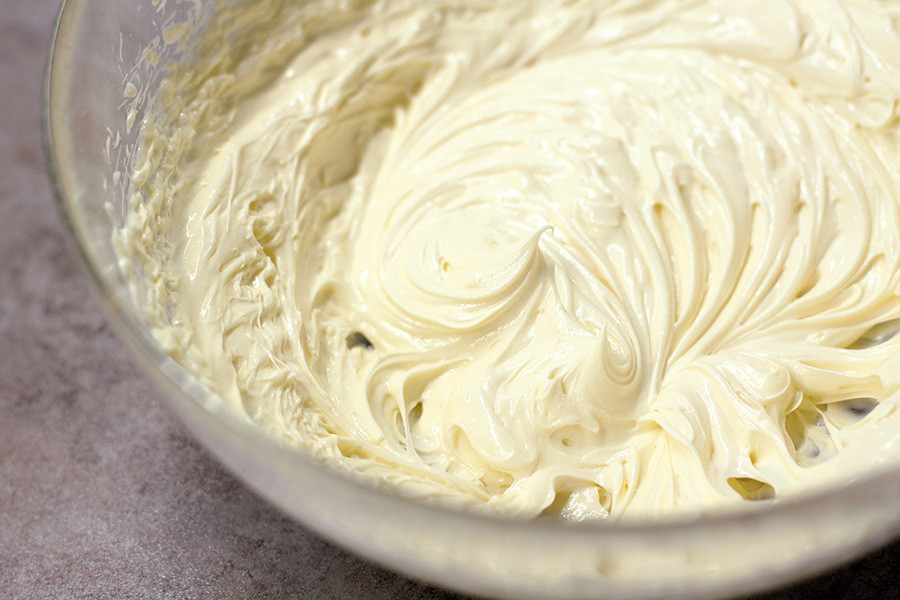
5. All you have to do is combine the cream with butter. First, beat soft butter in a separate bowl – it should become very silky and have a yellowish-white color.
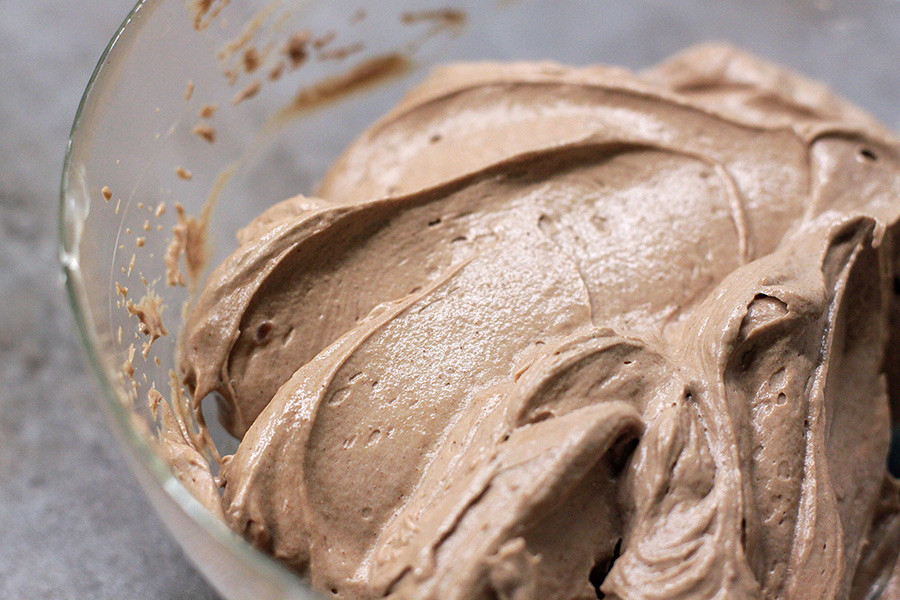
6. Next, start adding cocoa cream into the butter, tablespoon by tablespoon, and whisk with a mixer to achieve a nice and smooth consistency.
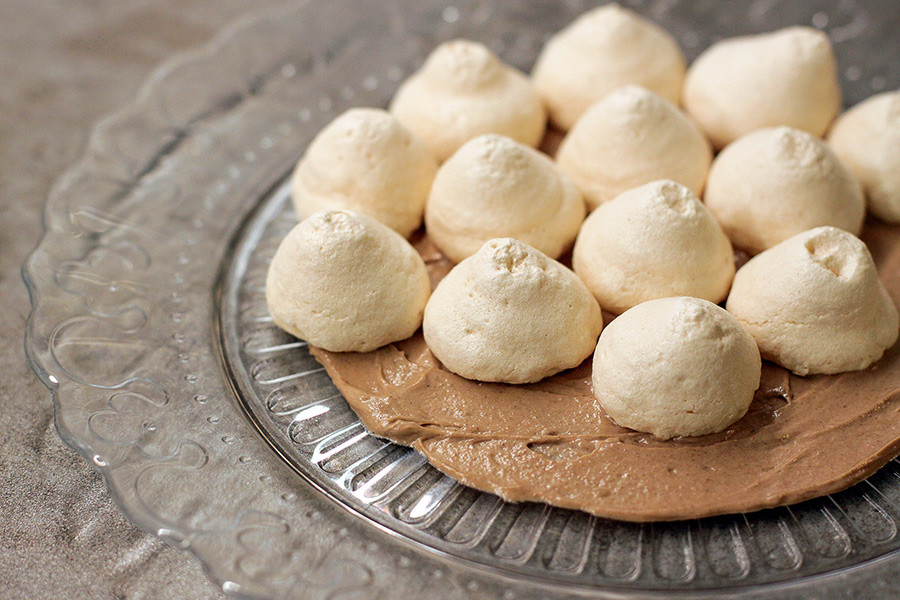
7. Now, it’s time to build the cake! Spread a tablespoon of the cream on the bottom of the plate and spread the first layer of meringues on top.
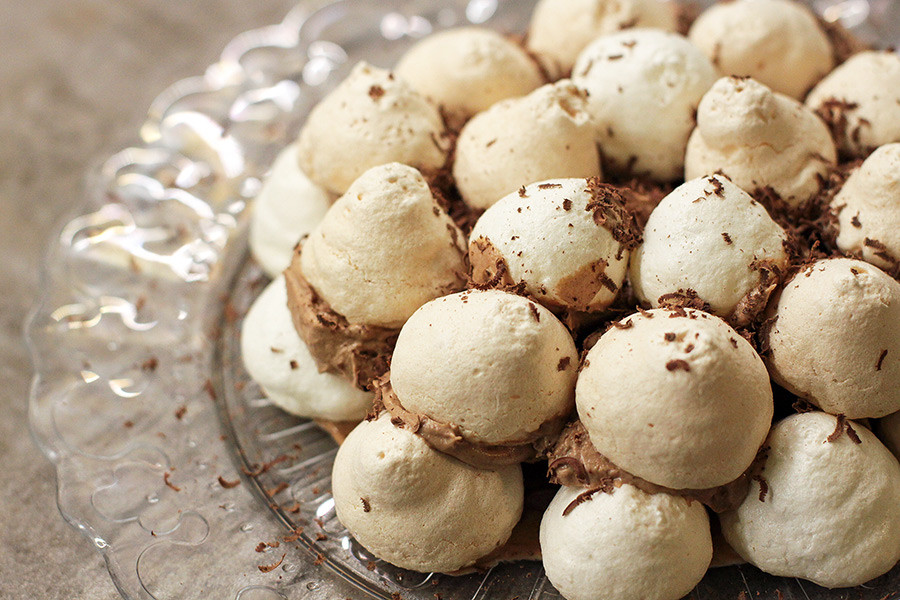
8. Assemble the cake dipping each meringue into the cream and creating the pyramid shape. Sprinkle each layer with generous amounts of ground chocolate; you can also add your favorite nuts.
9. Leave the cake in the refrigerator overnight, and enjoy with a cup of strong coffee. Priyatnogo appetita!

Read more: Baby pavlovas: A delightful dessert for summer parties that’s easy to make
If using any of Russia Beyond's content, partly or in full, always provide an active hyperlink to the original material.
Subscribe
to our newsletter!
Get the week's best stories straight to your inbox